Modifying your BMI guideline – Add new language
This tutorial provides a step-by-step demonstration on how to add another language to your GDL2 guideline using the GDL2 Editor. We are using the BMI guideline we created in the first tutorial so start by loading that guideline or, if you have not yet created it, visit GDL2 Guideline Tutorial I – BMI and follow the steps described there to model it.
Content
Translations in the source code
Translations in the Execution tab
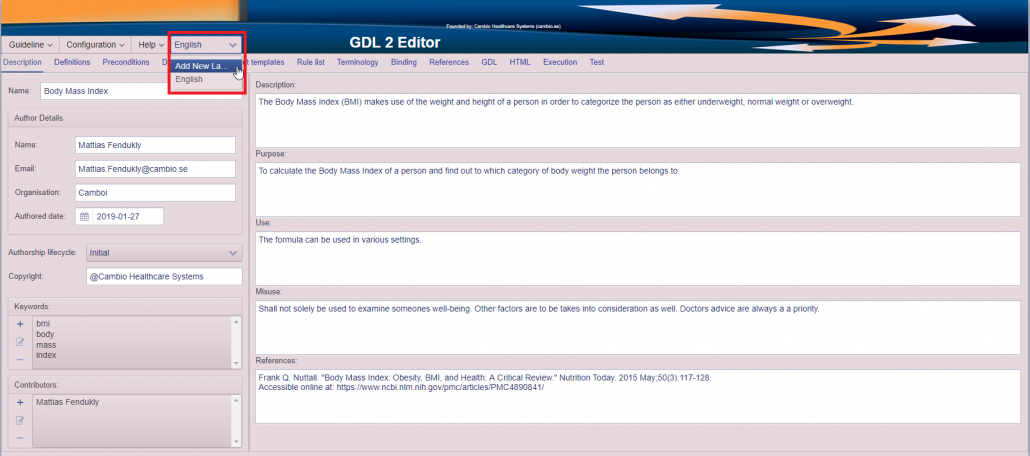
Add new language. When you have created the guideline you can add other languages, i.e. translate the guideline. To do that, go to the menu choice displaying the current language (the default language is English), click on the drop down arrow and select the choice “Add New La…”.
This opens a dialog box where you can choose what language you wish to add. You can either scroll through the different choices by clicking on the drop down arrow, as seen below:

or search for the language you want by writing it (in English) in the search box:
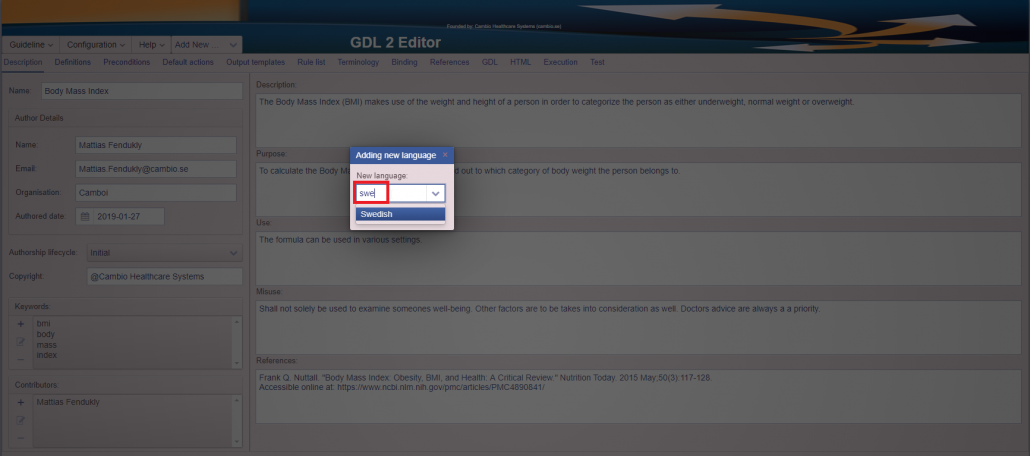
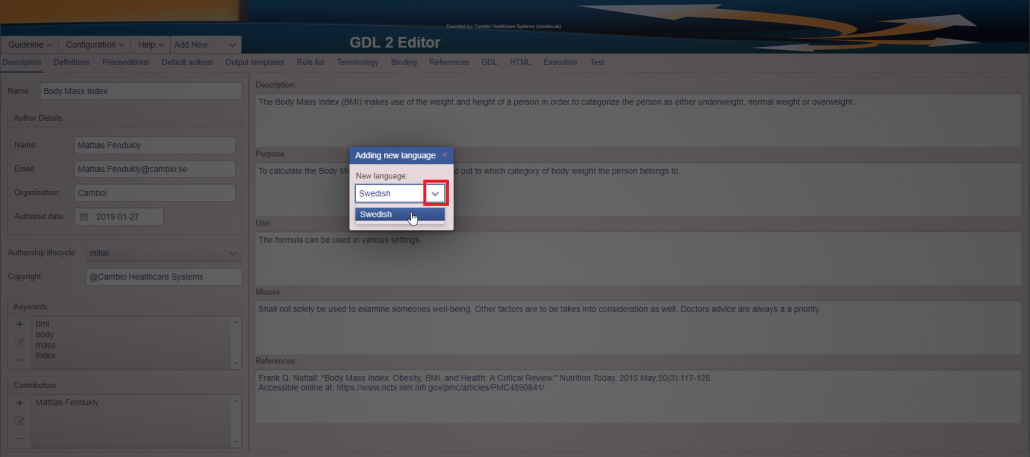
When you have found the language (here we choose Swedish), click on it and confirm your selection by clicking on the check mark.
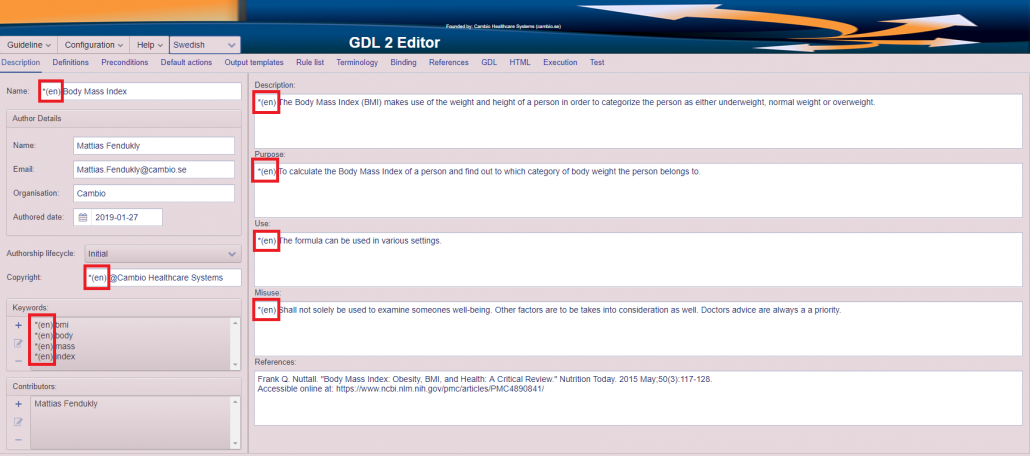
Translate the guideline. When you have added a new language you will see that the texts that you have written now start with *(en). This shows you which terms/texts are translatable and that they are currently displayed in English. In the picture below, the red boxes indicates all texts and terms that can be translated in the Description tab.
To translate the texts in the free-text field you simply remove the English text, inlcuding the *(en), and replace it with the translated text. The completely translated page can be seen further down.
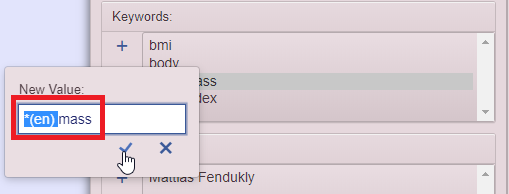
To translate the keywords you select the keyword (it gets highlighted with blue) and click on the pen-and-paper symbol to the left:

Then you write the translation in the New value dialog box that opens up. In this case, we do not want to translate the word “mass” to Swedish, so we simply remove the *(en):
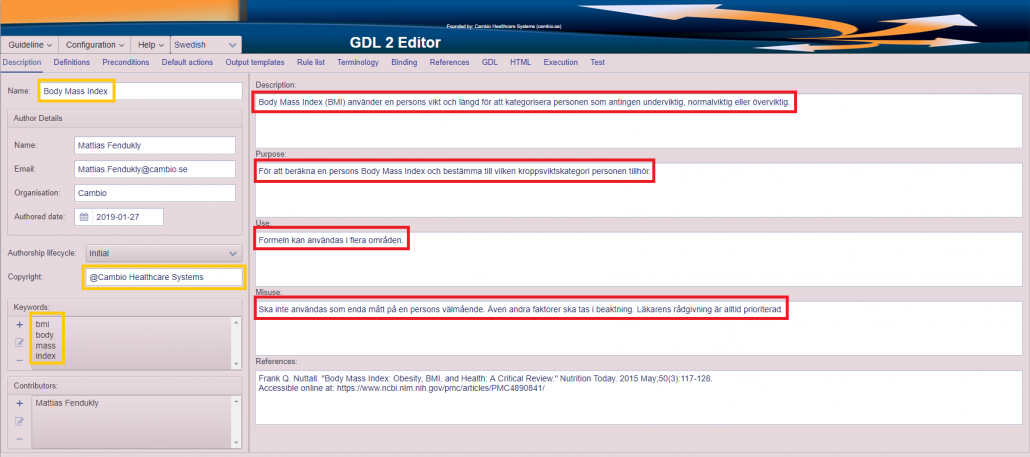
Below you can see the Description tab when all translations have been completed. The sentences marked with red boxes have been translated to Swedish and for the texts/terms in the yellow boxes the *(en) prefix have simply been deleted.
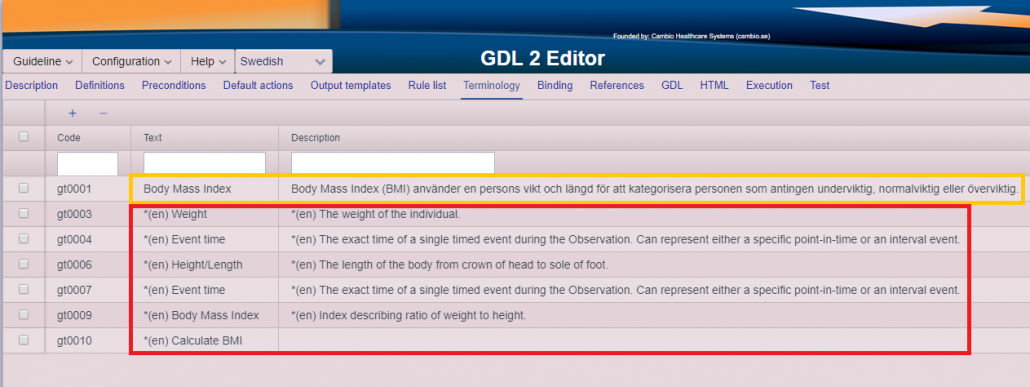
The next step is to translate the terms and descriptions used in the logic of the guideline. This can be done by going to the Terminology tab. Below you can see all terms and which should be translated (red box). Note that the first term, marked with a yellow box, is already translated to Swedish. That is the guideline’s name and was translated already in the Description tab.
To translate these terms you need to enter the row’s edit mode. This is done by double clicking on the text or description of that row, e.g. the term “Weight” as seen below:
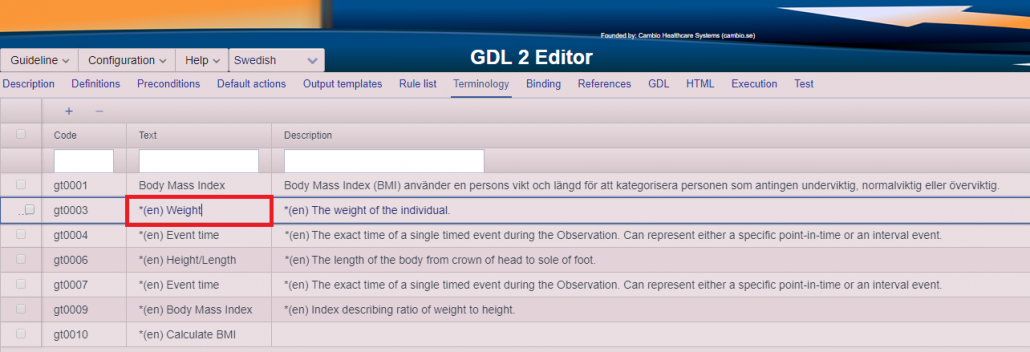
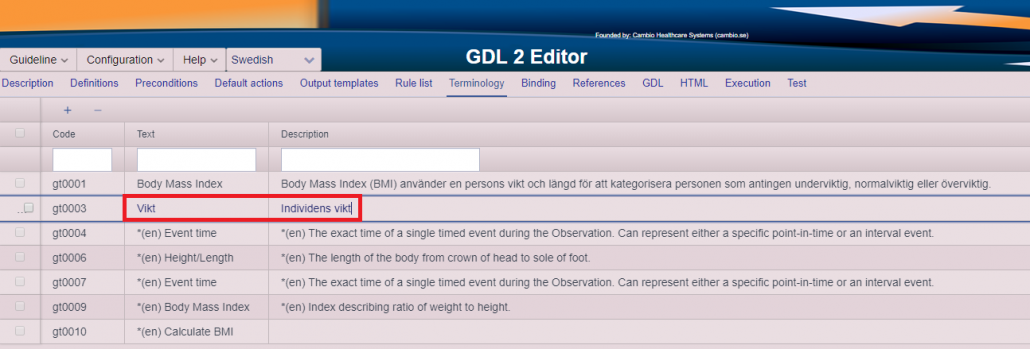
In the edit mode you can replace the text, including the *(en) prefix, with the translation:
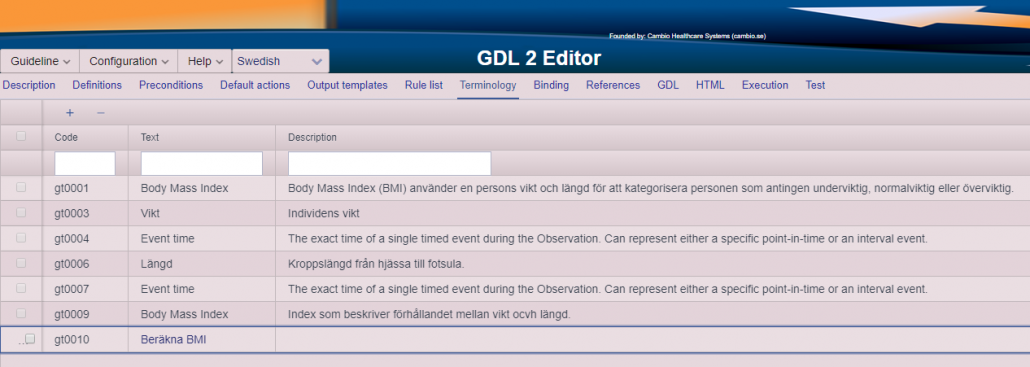
Do this for all necessary terms. Here we have left the text and description of the gt0004 and gt0007 codes (Event time) in English. The only thing edited is that the *(en) prefix has been deleted.
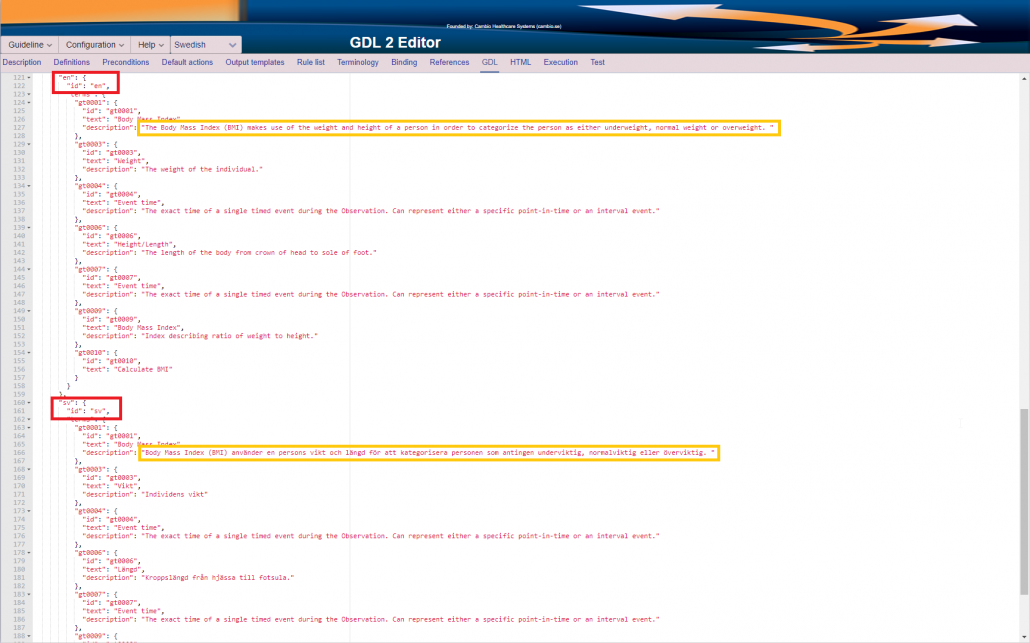
Translations in the source code. The source code can be inspected in the GDL tab. If you scroll down to the end of the file, you will see the translations that you have created. The red boxes highlights the beginnings of the English and Swedish term definitions. The yellow boxes highlights the corresponding translations of the guideline description.
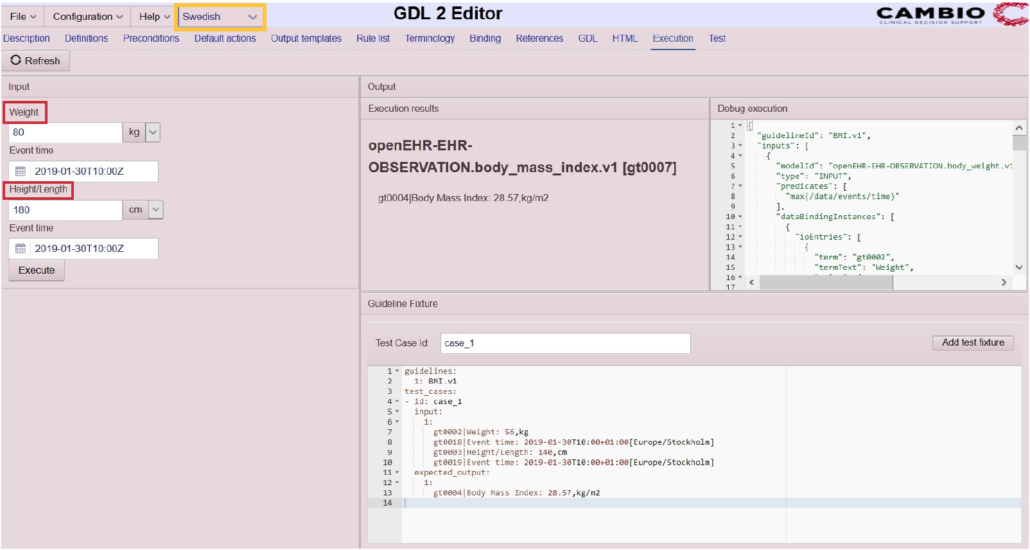
Translations in the Execution tab. Please note that when you are trying your guideline in the Execution tab, the input terms will not use the translations of the current language, but will keep the English translations. Below you can see the terms still being “Weight” and “Height/Length” (red boxes) although the selected language is Swedish (yellow box).