GDL2 Guideline Tutorial BMI (FHIR)
Introduction
This tutorial guide is a supplement to the Archetypes guide, utilising existing models to provide a step-by-step demonstration on how to design basic guidelines for different types of clinical decision support (CDS) applications using the GDL2 Editor.
Creating a Guideline
In order to generate data for storage and documentation, a guideline is required. Guidelines are used to express clinical rules and algorithms, and use one or more archetypes or profiles to mimic the rules used in clinical practice. Even if two guidelines use the same archetypes/profiles they can be used to model different concepts according to the rules used in each guideline.
This guide provides step-by-step instructions on building a common calculation-based guideline model using the GDL2 Editor. This example builds on the steps from the earlier introductory guide that provides instructions on installing and setting up the GDL2 Editor.
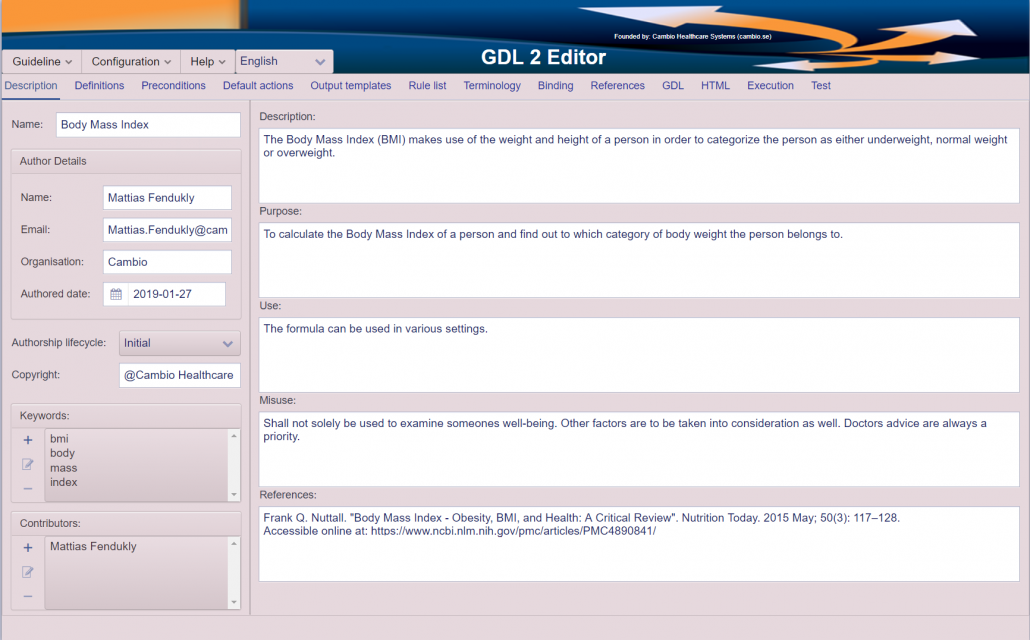
The BMI provides a height- and weight-based method of categorizing the body mass of a person. There are different categories to take in to consideration, the main three ones are however: underweight, normal weight, and overweight. An overview of the finished BMI guideline is displayed below:
Metadata
First, add metadata in the Description tab which is opened upon launching the program:
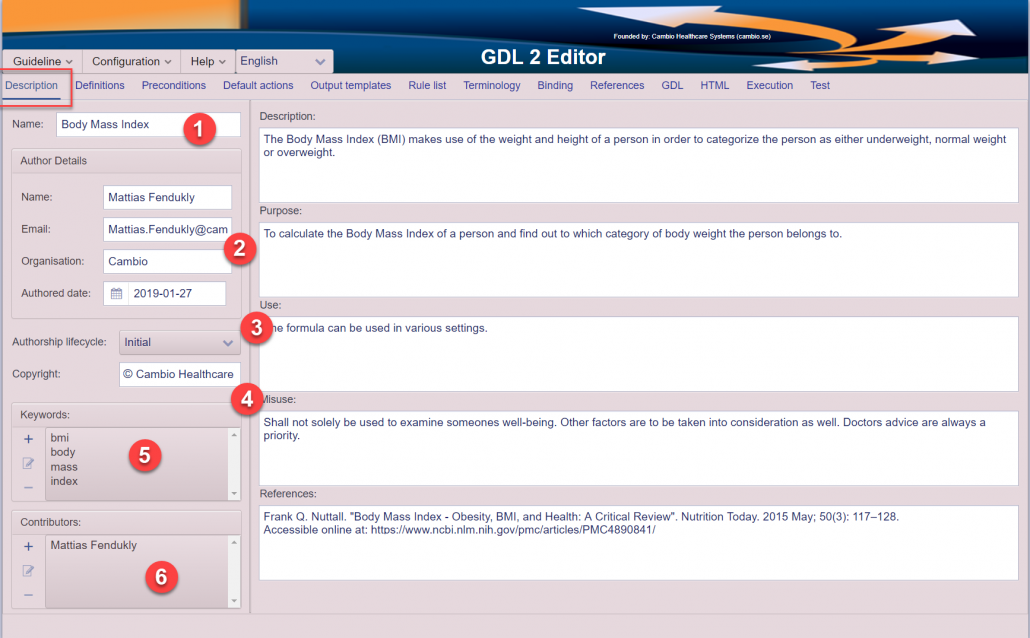
- Name the guideline.
- Enter the author details including organisation and date of creation.
- Select Author draft from the Authorship lifecycle drop-down menu.
- Add the Copyright.
- Use the + to add and – to remove keywords. The pencil icon can be used to edit existing keywords.
- Enter the names of any Contributors.
Next, enter text into the 1. Description, 2. Purpose, 3. Use, 4. Misuse and 5. References sections:
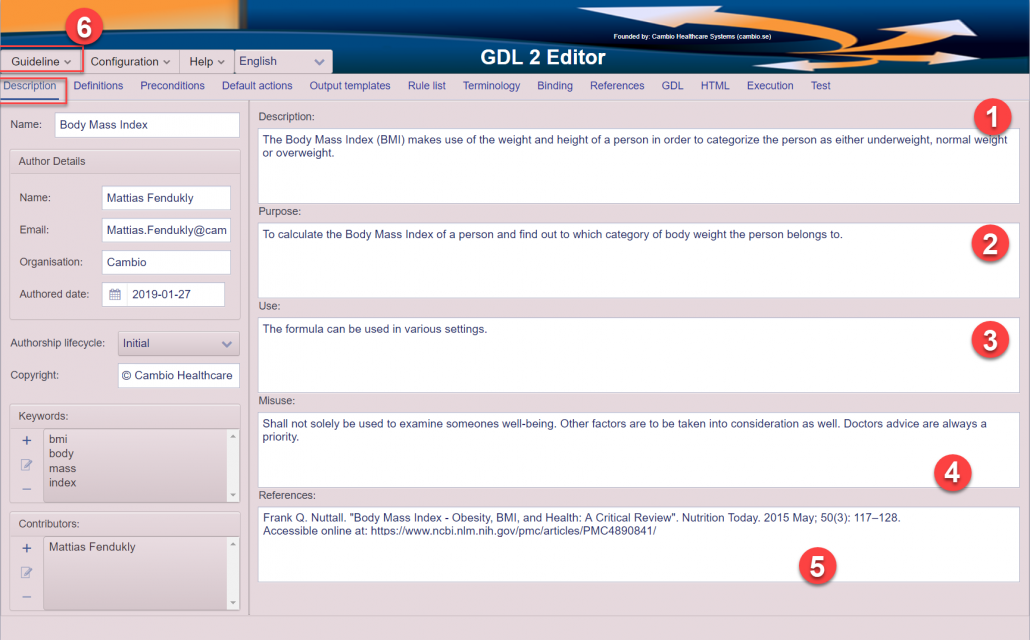
Once all the metadata is filled in, ensure the model is saved (6). Additionally, loading necessary openEHR Archetypes or FHIR Profiles will be required in order to build models in the coming steps. Loading Archetypes or FHIR Profiles are done by clicking (6), “Guideline” – and then “Import Archetype/FHIR Profile”.
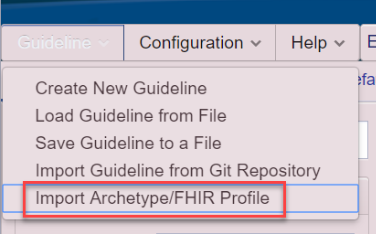
Clicking “Import Archetype/FHIR Profile” will open up a subwindow within the Editor.
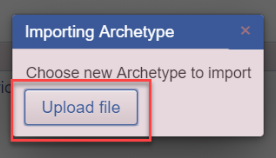
Clicking “Upload file” will point to the local repository. One archetype or FHIR profile can be selected, it is also possible to load multiple files in a compressed format (.zip).
Definitions
After all the metadata has been added, the next tab to go to is the Definitions tab.
Complete definitions of the BMI are shown in the image below. There are two input profiles and one output profile. The input profiles are created to hold the input of height and weight and the output profile holds the BMI calculation:
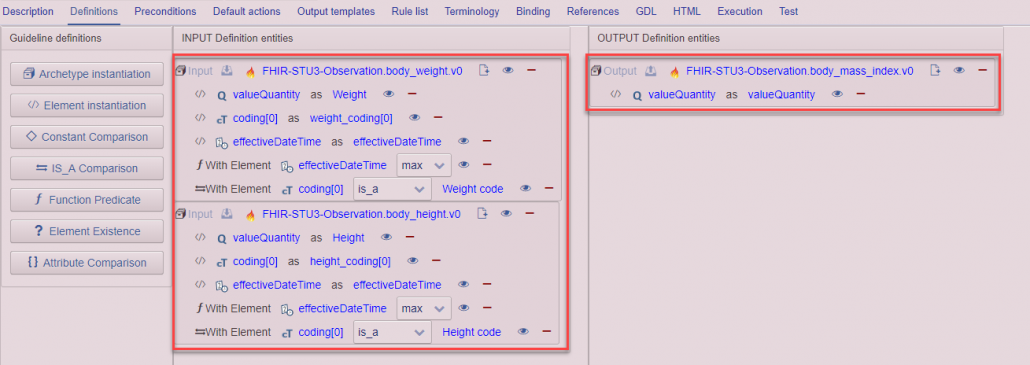
The input parameters are defined in the left bar, and the output parameters are defined in the right bar.
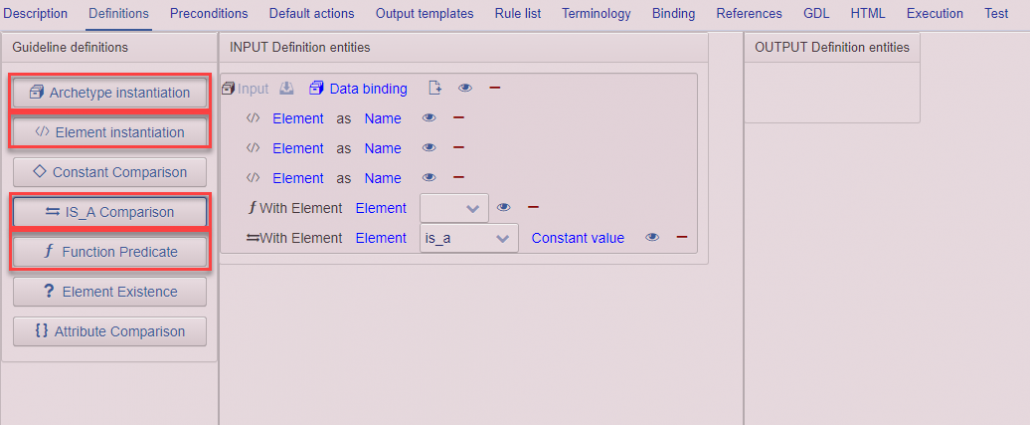
- Drag and drop the Archetype instantiation element from the left-hand side to the main modelling screen.
- Drag and drop three Element instantiation elements by dropping them on top of the already instantiated blank Data binding.
- Drag and drop the Function Predicate element on top of the already instantiated blank Data binding.
- Drag and drop the IS_A Comparison element on top of the already instantiated blank Data binding.
Assign the blank elements as shown below:

- Click on Data binding.
- Choose the body weight profile from the folder.
- Click on the check mark to select it.
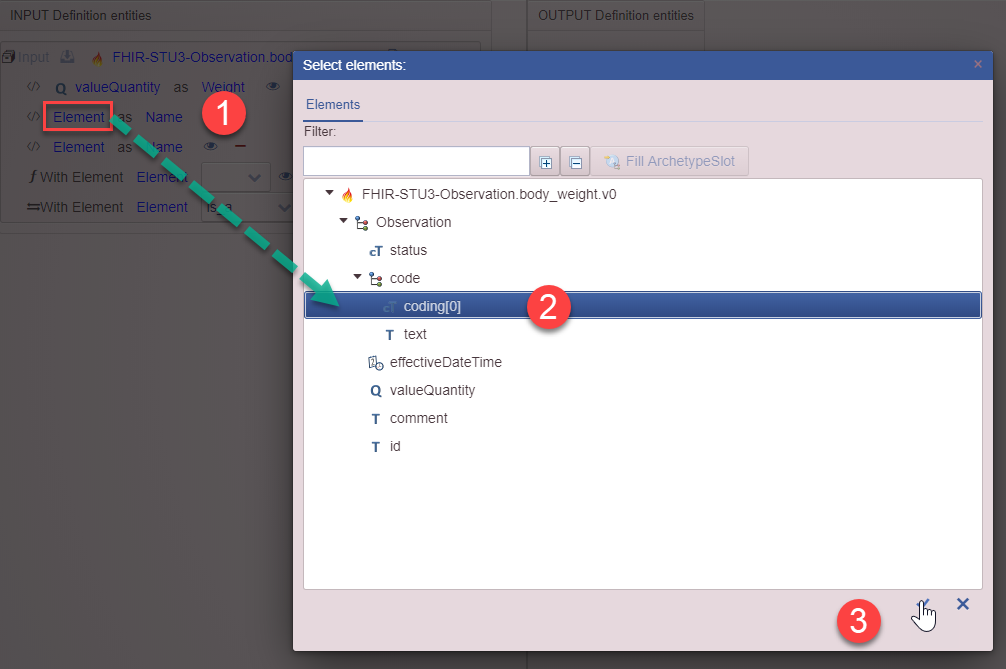
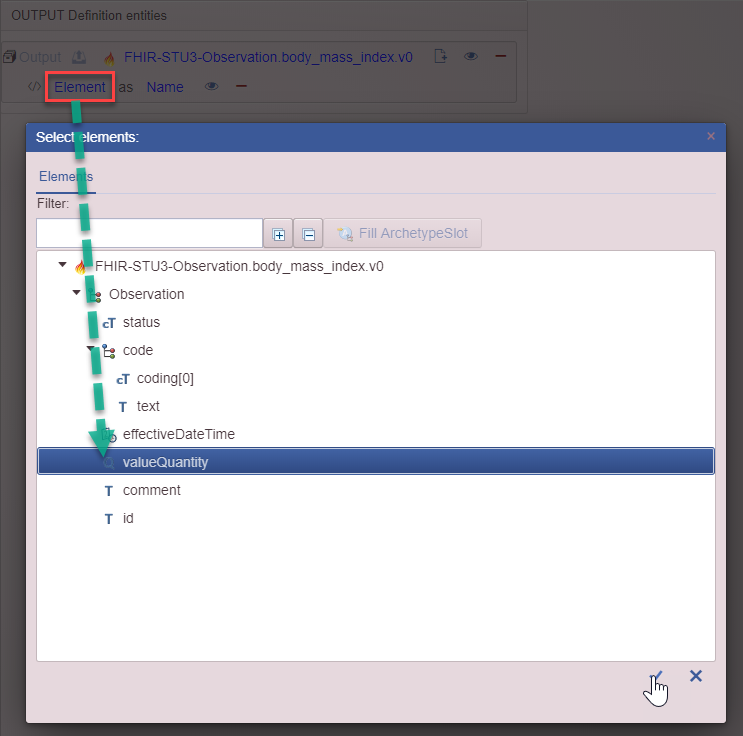
Next, the element attributes can be entered:
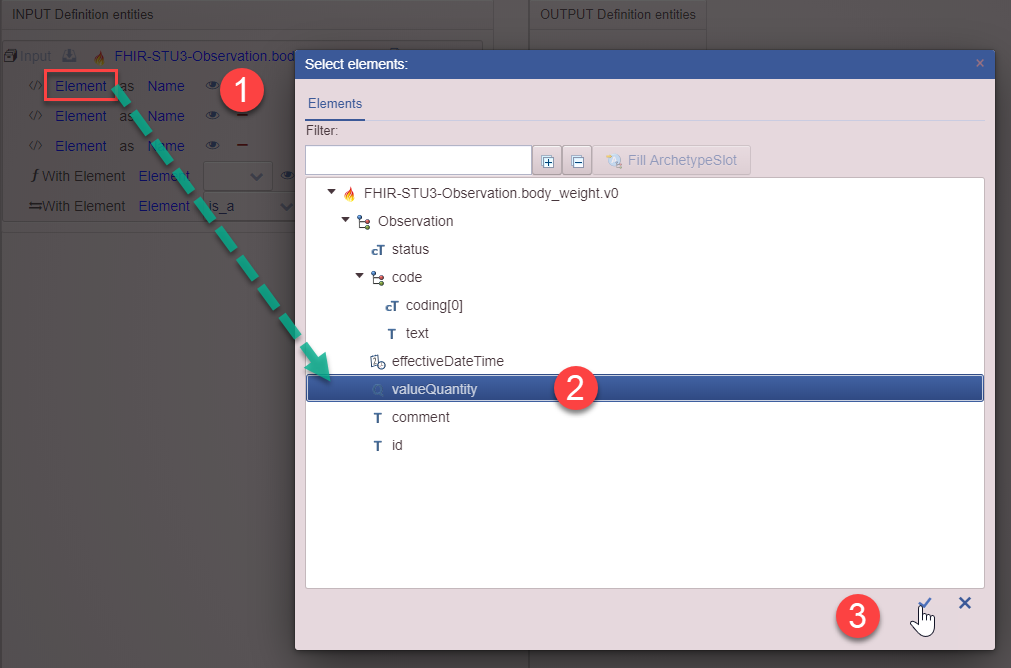
- Click on the Element slot.
- Choose the valueQuantity for Weight.
- Click on the check mark.

Name the valueQuantity element by clicking valueQuantity and writing the name in the textbox.
Do the same for the next element, instatiating coding[0].
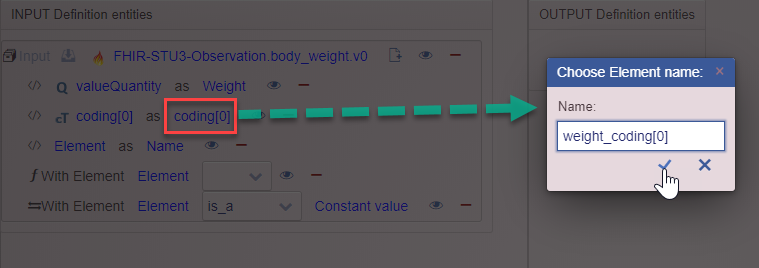
Clicking on coding[0] allows you to name the element.
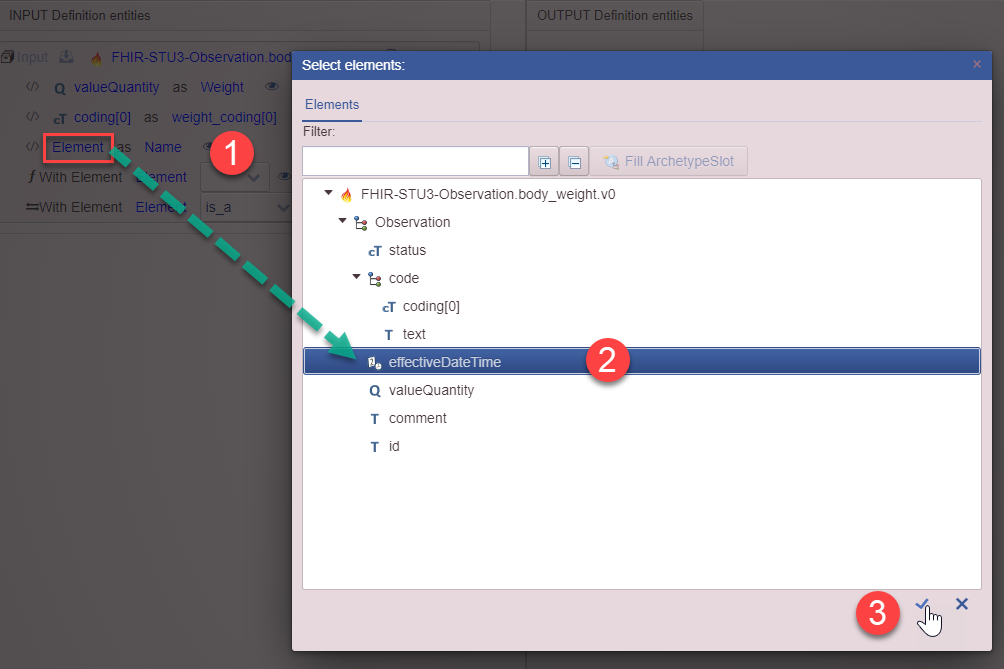
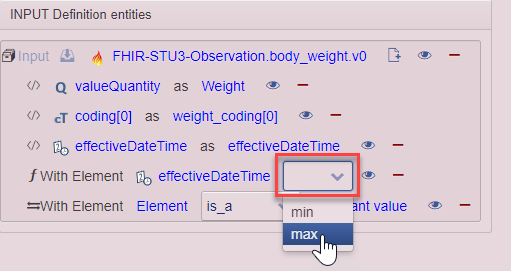
Do the same for the next element, instantiating effectiveDateTime.
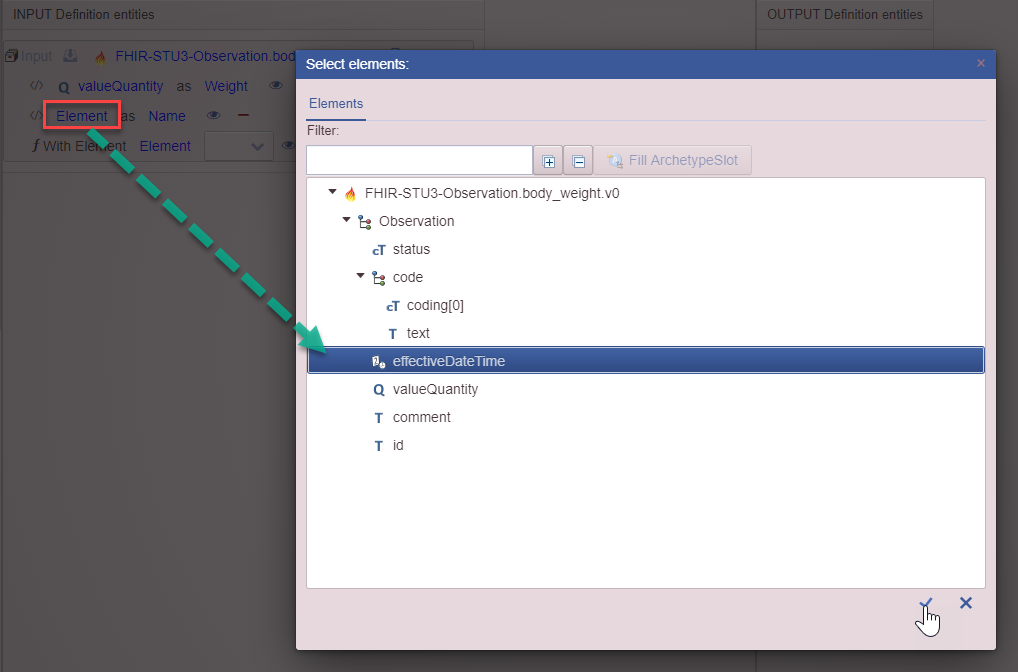
Instantiate effectiveDateTime also in the Function Predicate element and select max from the dropdown list to ensure use of the most recent weight value.
Instantiate coding[0] in the IS_A Comparison element to allow term binding.
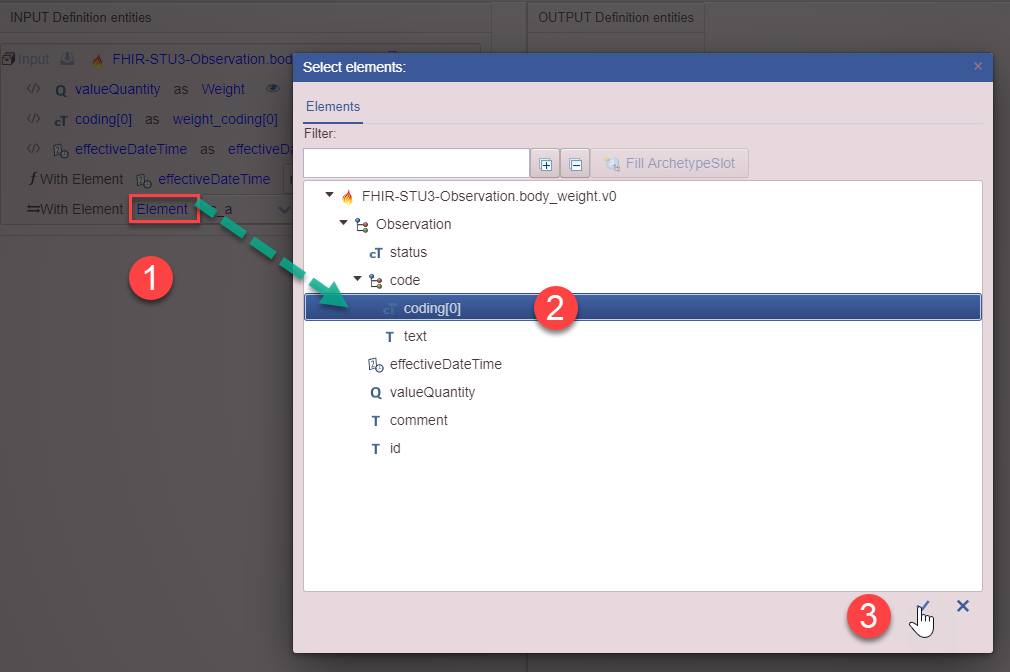
- Click on the Element slot.
- Select coding[0].
- Click on the check mark.
Perform the term binding by following the steps shown below.

- Click on Constant value in the IS_A Comparison element.
- Click on Add local term in the appearing window. This opens a new window.
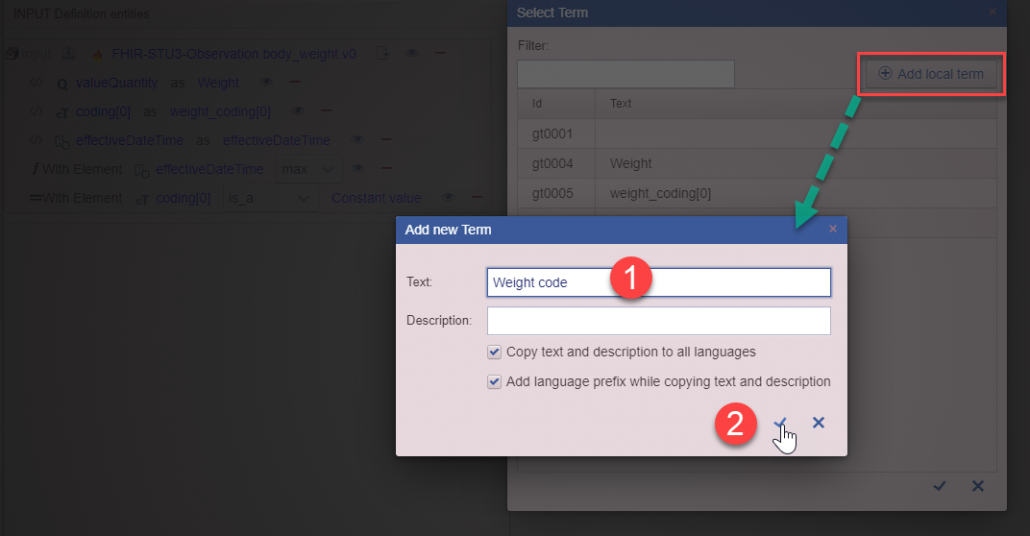
- Enter a text describing the local term
- Click on the check mark. This takes you back to the Select Term window.
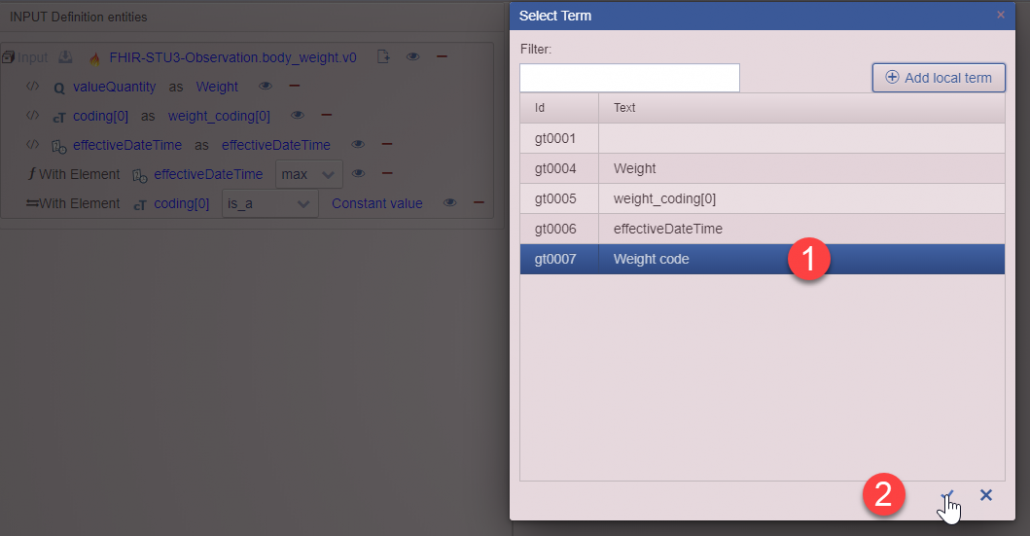
- Make sure the newly added term is selected.
- Click on the check mark. This closes the window and brings you back to the Definitions tab.
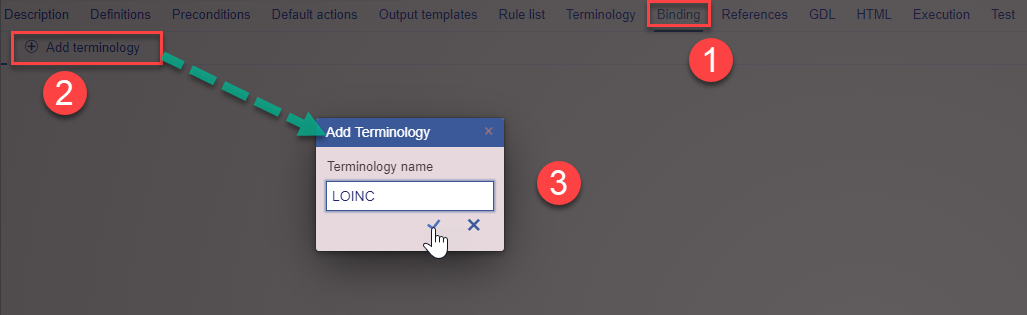
- Go to the Binding tab.
- Click on Add terminology.
- Enter the terminology name “LOINC” and click on the check mark.
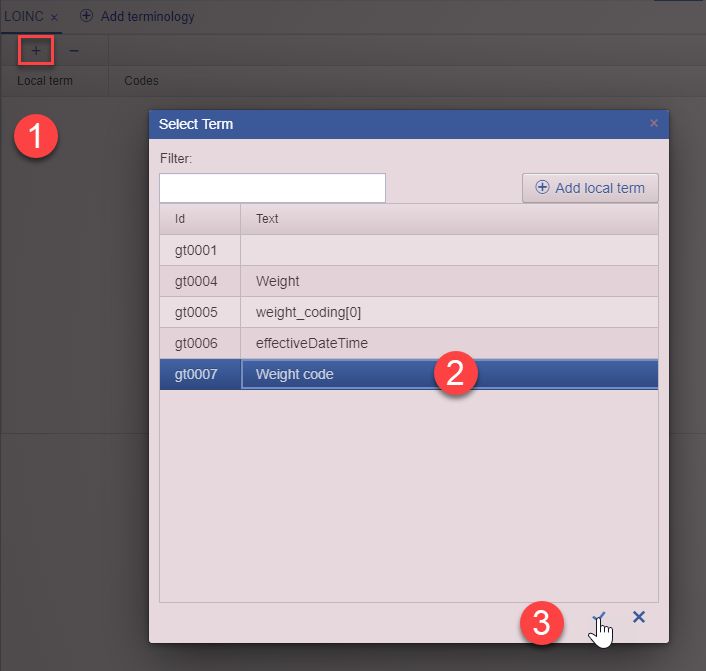
- Click on the plus sign.
- Select the term you want to bind to a terminology code.
- Click on the check mark.
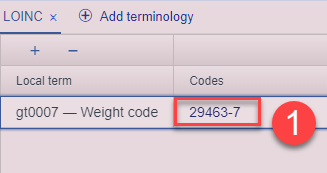
- Double click in the empty space under Codes next to the local term and write the terminology code(s) that should be bound to the local term. Here, the code 29463-7, which is the LOINC code for body weight, has been entered.
Repeat the above sequence to create another blank input profile instantiation to hold the Height data element needed for calculating the BMI score as mentioned earlier. Instantiate a Height profile to contain a Height valueQuantity element, a coding[0] element, bound to the LOINC code for body height through the IS_A Comparison, and an effectiveDateTime element with Function Predicate set to max.
The last instantiated profile is an output profile which holds the BMI calculation result. This is made up of only one internal element: the holder for the calculated BMI value. There is no need for an effectiveDateTime element, as the calculation is triggered anew upon usage, and no need for a coding[0] element, as it is the only output type Observation profile.
Make sure to select the Output type when instantiating the profile:
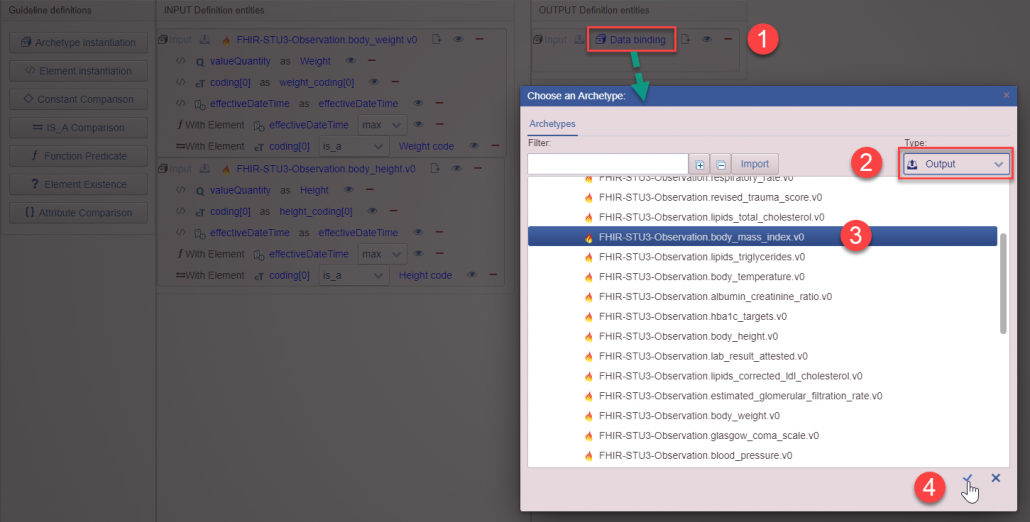
- Click on Data binding within the archetype instantiation slot
- Choose Output in the drop down menu located in the upper right corner
- Choose the body_mass_index profile from the folder
- Click on the check mark to select it.
Complete the BMI profile by instantiating the valueQuantity element for BMI.
Rules
Once the definitions have been created, they can be used to construct the rules for the BMI calculation.
BMI has only one rule that calculates the body mass index. The following section will display the construction of the rule.
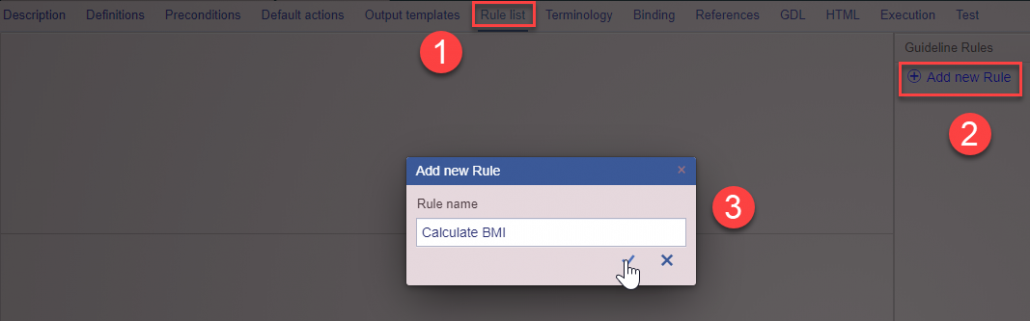
- Go to the Rule list tab.
- Click on Add new Rule.
- Enter the rule name and click on the check mark.
Once the check mark has been clicked, the guide shows a new window for the specific rule:
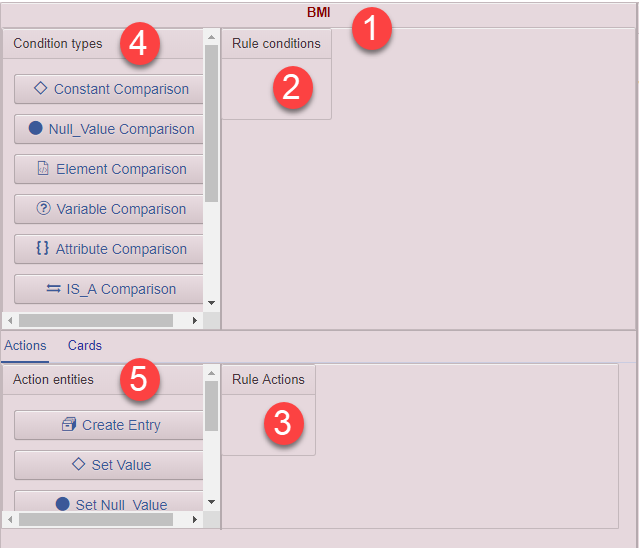
- Name of the created rule.
- Conditions modelling area.
- Actions modelling area.
- Condition elements – used to model the conditions required to be fulfilled for the rules to fire.
- Action elements – trigger when the conditions assigned in the top modelling area are fulfilled.
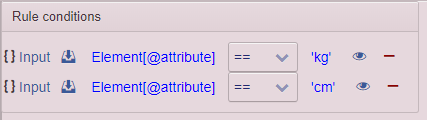
Conditions that must be fulfilled for the rule to calculate BMI:
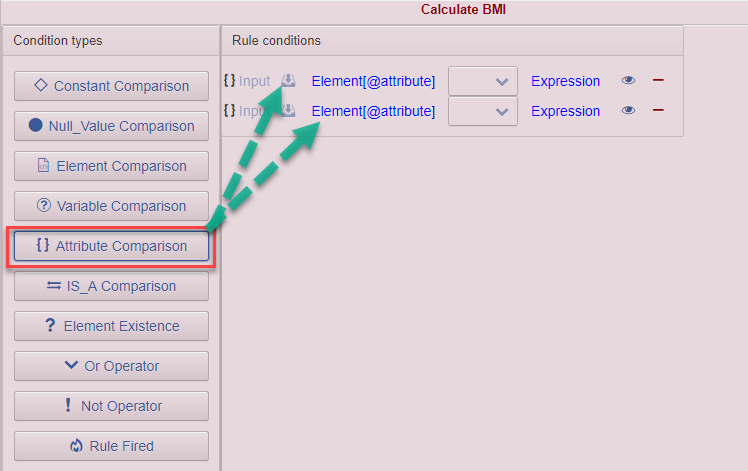
Drag and drop two Attribute Comparison elements into the rule conditions modelling screen.
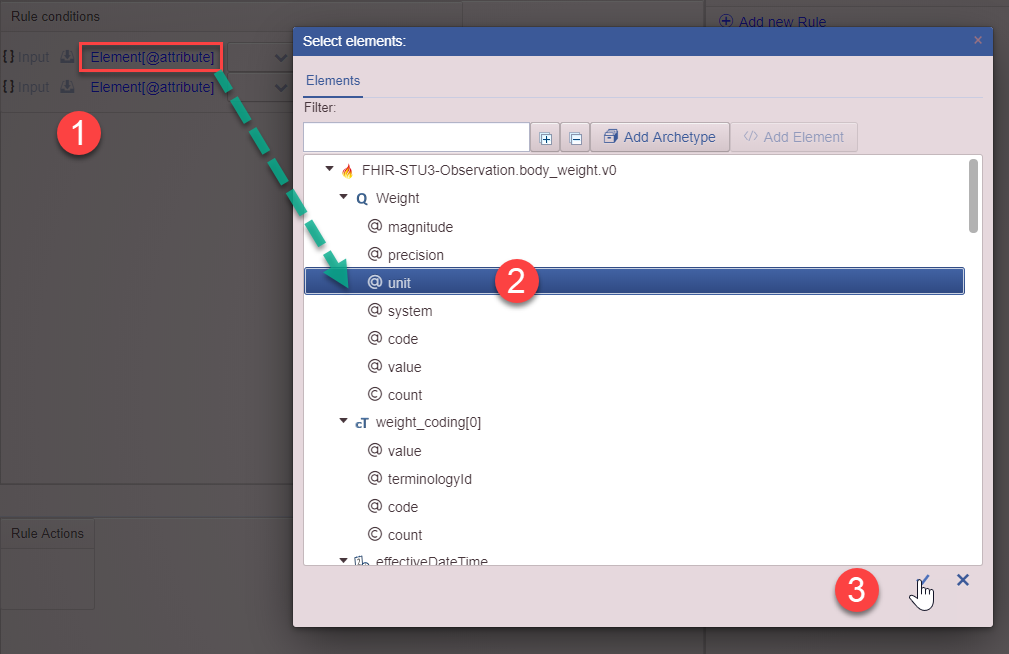
- Click into the first Element[@attribute] element.
- Choose unit from the body weight profile.
- Click on the check mark.
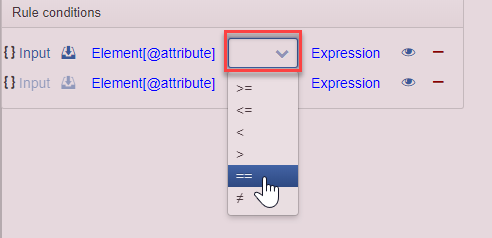
Choose the == from the drop-down menu.
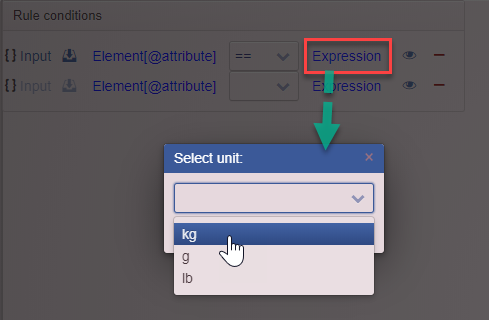
Click on Expression and choose kg from the drop-down menu.
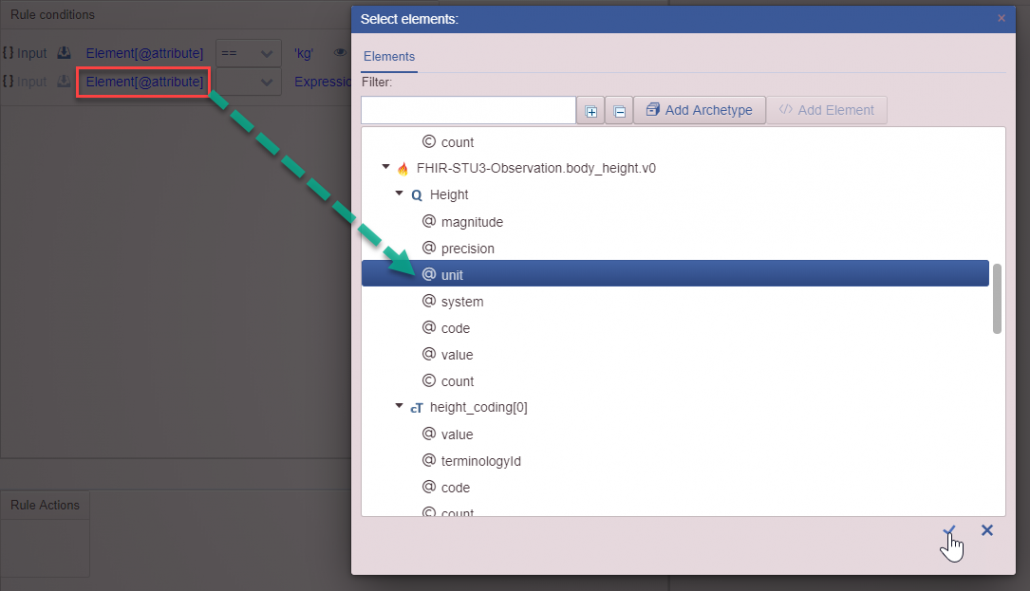
Do the same steps for the Height profile and choose unit “cm”.
Once all the conditions for the BMI calculation rule have been entered, the actions in the bottom part of the rule modelling window can be set:
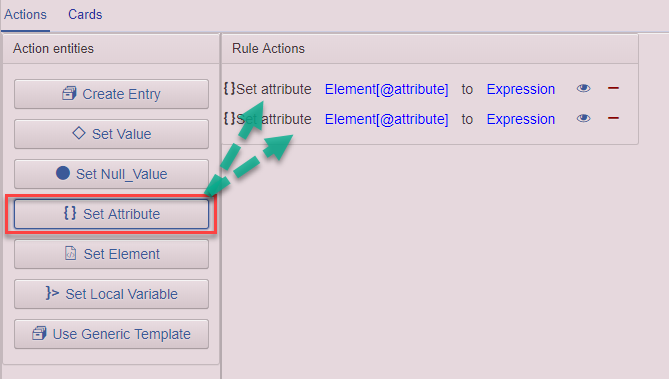
Instantiate two Set Attribute elements.
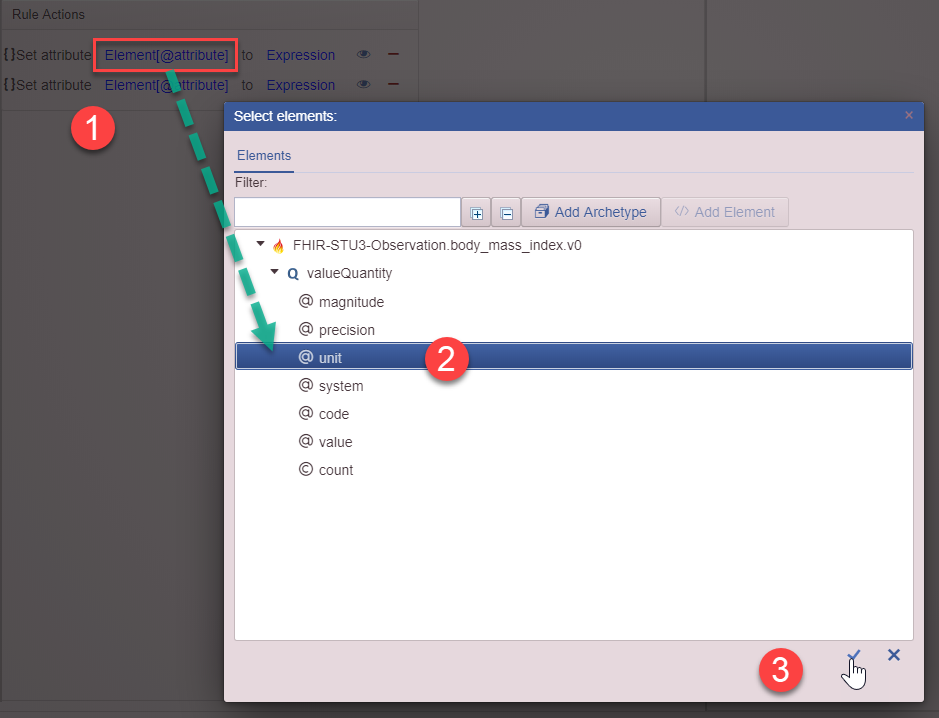
- Click on the first Element[@attribute] element.
- Select unit from the body mass index profile.
- Click on the check mark.
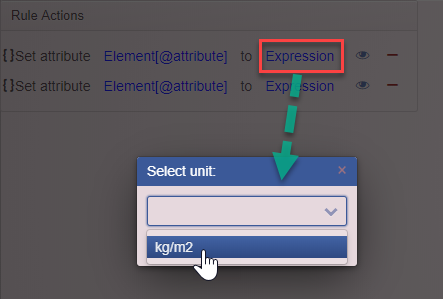
Click on Expression and select the unit kg/m2 from the drop-down menu
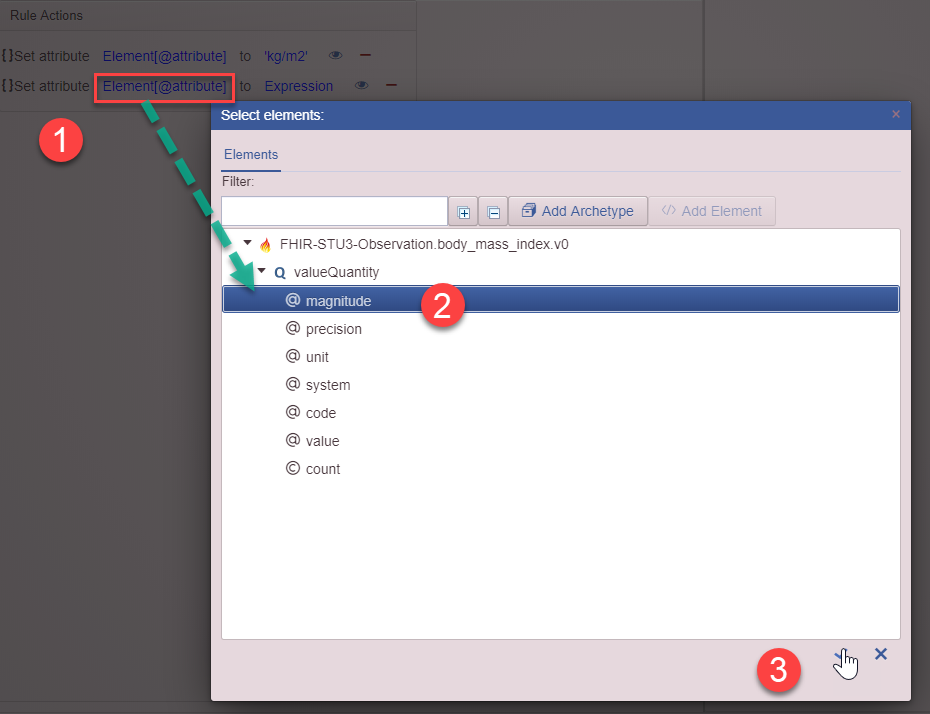
- Click on the second Element[@attribute] element.
- Select the magnitude attribute from the body mass index profile.
- Click on the check mark.
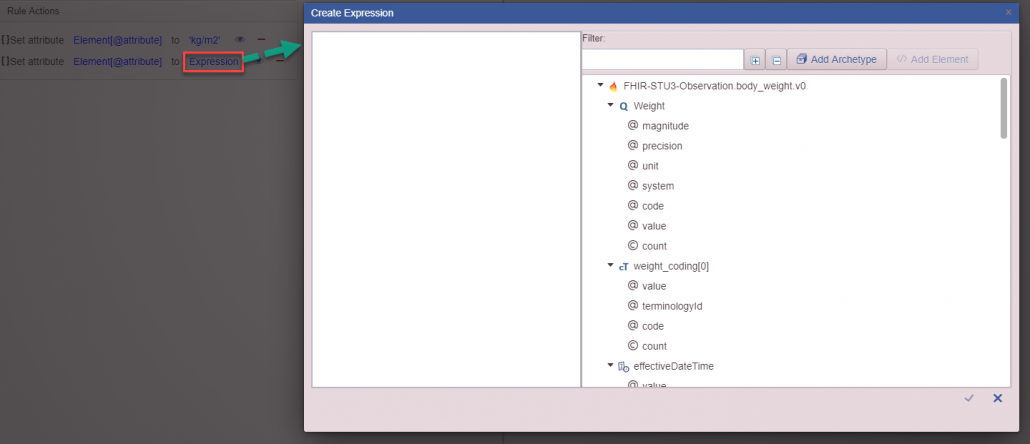
Click on Expression to open the Create Expression window. This window holds the Expression editor, where the expression for BMI can be created. The expression reads:
BMI [kg/m2] = weight [kg]/(height [cm]/100)^2
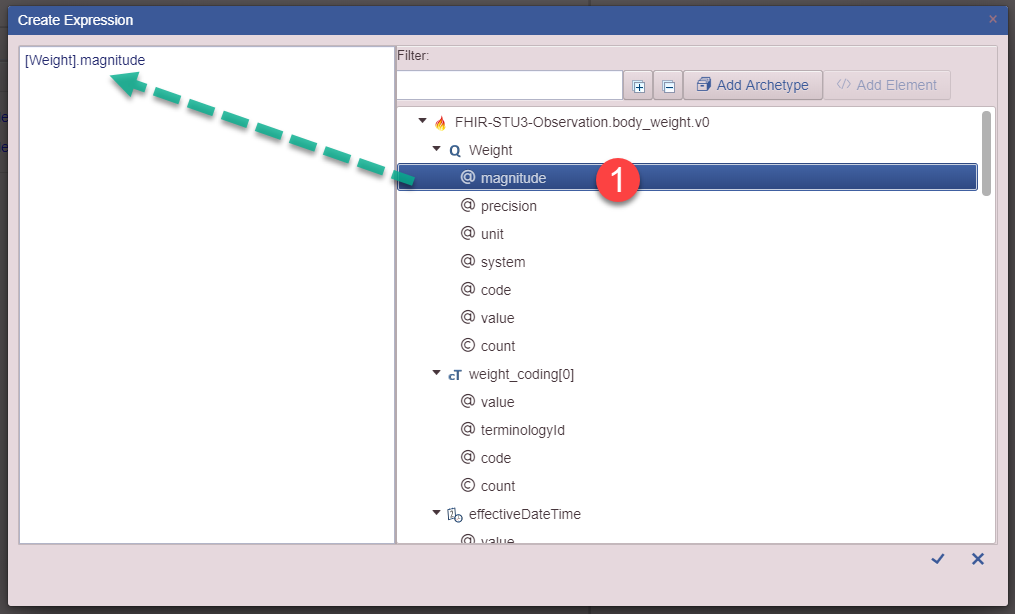
- Double click on magnitude from the body weight profile to instantiate it in the expression editor on the left.
- After [Weight].magnitude, write /( to continue the expression.
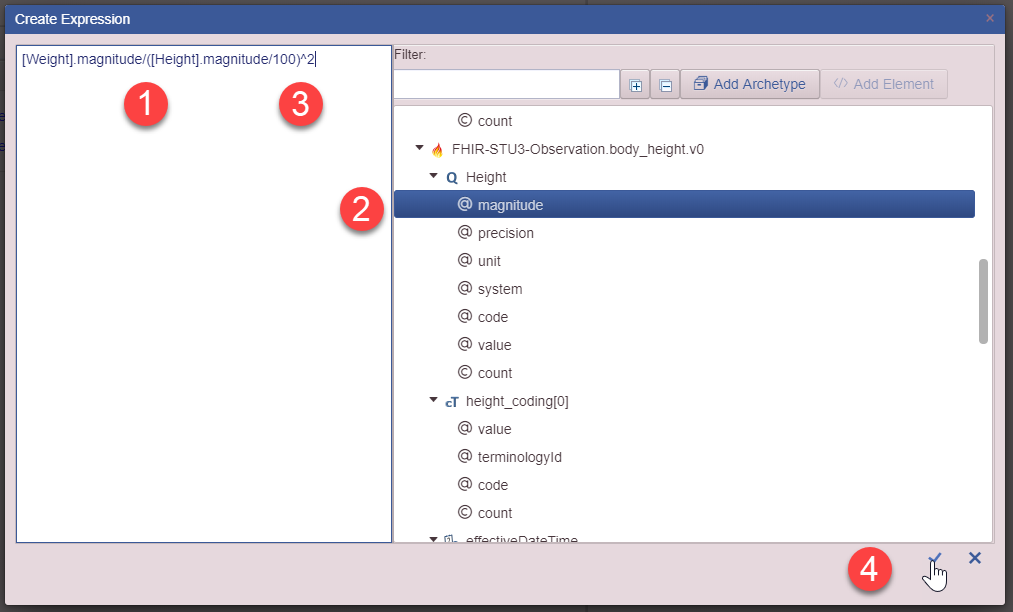
- Double click on magnitude from the body height profile, after which it appears in the Expression Editor.
- Finish the expression by writing /100)^2 in the editor.
- Click on the check mark.
Once all the conditions and actions have been set – remember to save the model, which is done through Guideline in the menu.
Overview and Trial Run
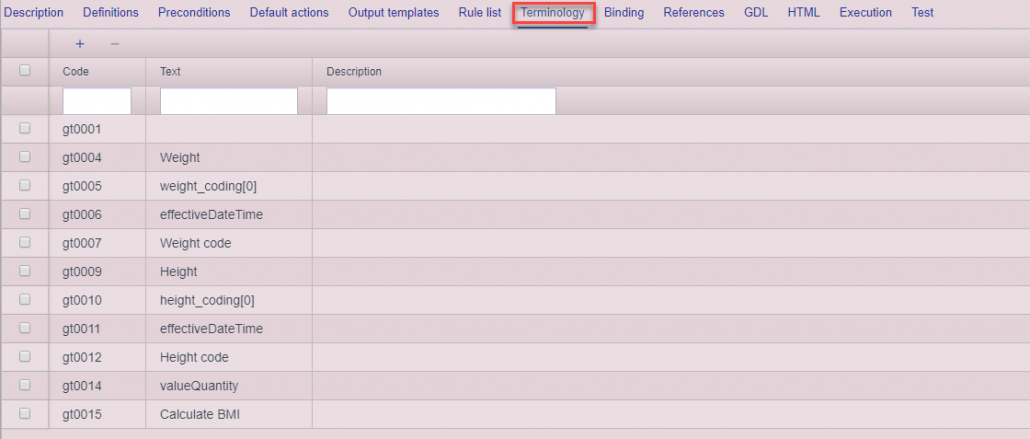
Once all the data has been added, the Terminology tab displays the codes:
All that is left is to test the model. This is done in the Execution tab:
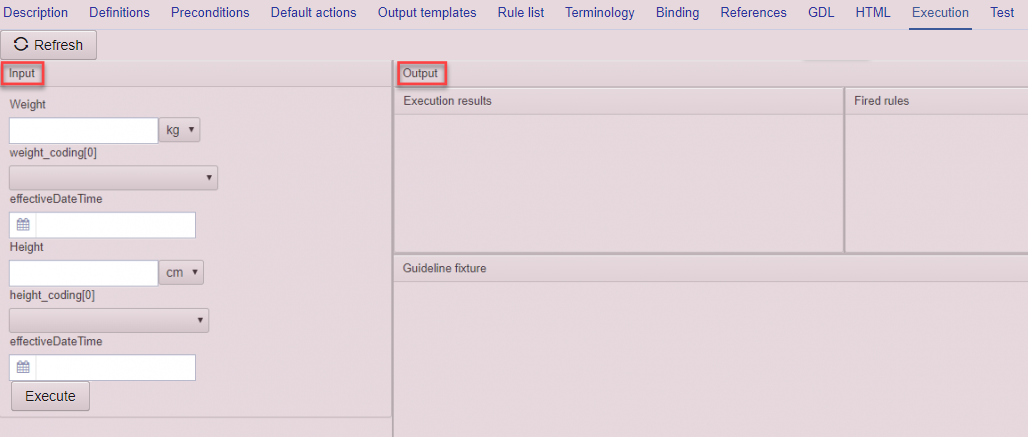
In the Execution tab, the Input fields are on the left, and the output fields are on the right.
There are several kinds of input types:
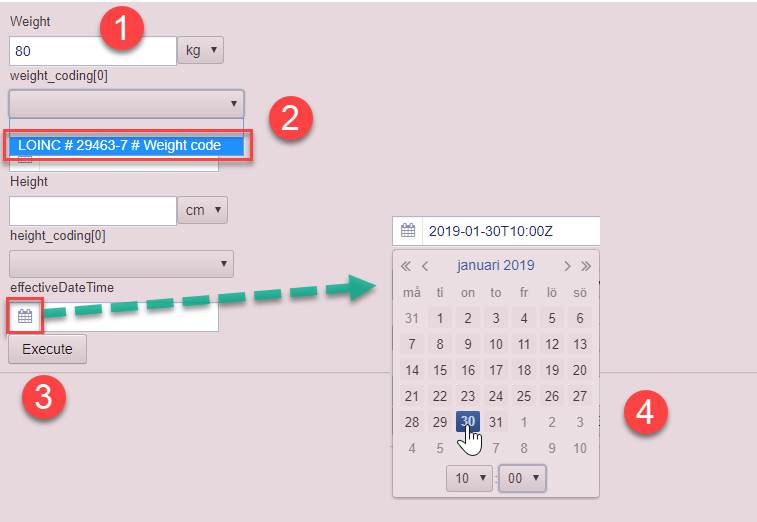
- Write input data in the text boxes.
- Choose input data from drop-down menus.
- Click on the calender sign to open a calender.
- Click on a date och choose a time to set the effectiveDateTime for the observation.

- Input data in all input fields.
- Click on Execute.
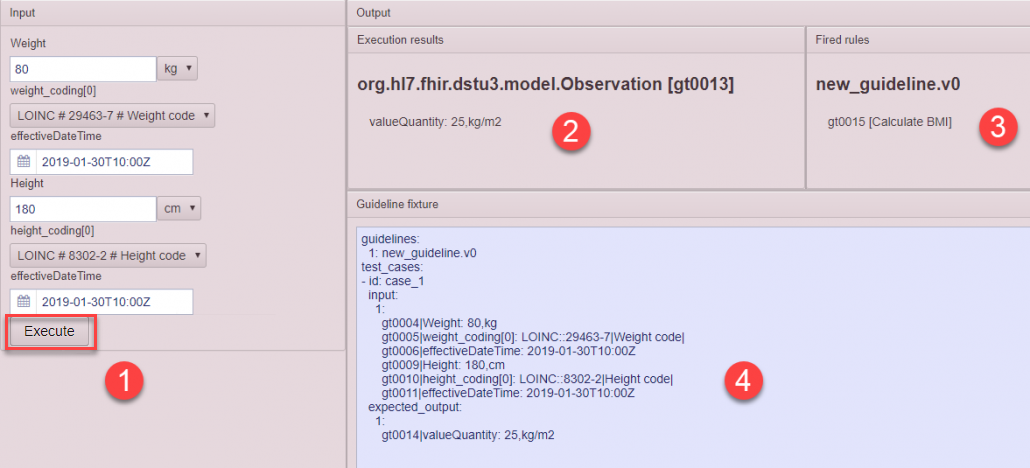
- Clicking Execute executes the guideline’s rules.
- Execution results shows the calculated BMI
- Fired rules shows that the rule Calculate BMI has been fired.
- Guideline fixture generates a test case based on the current input data.
Further testing can be done in the Test tab:

This tab holds a text fixture editor where test fixtures can be created, saved and uploaded to enable more extensive testing.
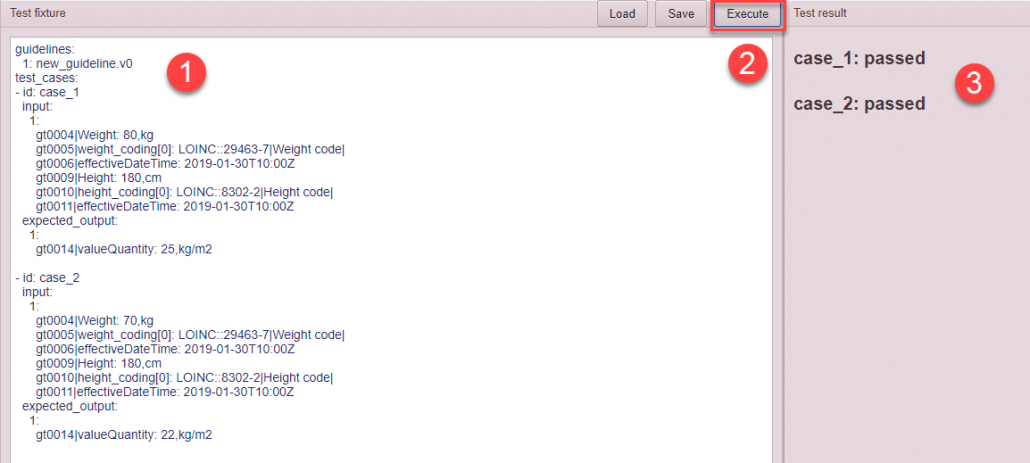
- Copy and paste the test fixture from the Execution tab. Add more test cases using the same structure if desired.
- Click on Execute.
- See the result for each test case.