GDL2 Guideline Tutorial VI – FLIPI Assessment
After calculating the Follicular Lymphoma International Prognostic Score it is possible to determine the patient risk group and survival rate from the previously calculated score. It is a convention to do this calculation in a different guideline, called assessment.
Here, we have 3 patient risk groups:
- Low risk with a 10-year survival rate of 70% (for score 0-1),
- Medium risk with a 10-year survival rate of 50% (for score 2),
- High risk with a 10-year survival rate of 30% (for score 3 or greater).
1. Start a new guideline, import the archetypes, and name the new guideline as "Follicular Lymphoma Index Assessment".
- To start to create the guideline, open the GDL Editor if not already open (if help needed refer to the previous chapters).
- Import all archetypes by importing archetypes.zip file.
- If you have another guideline open, click on the Create New Guideline item in the menu to start an empty guideline.
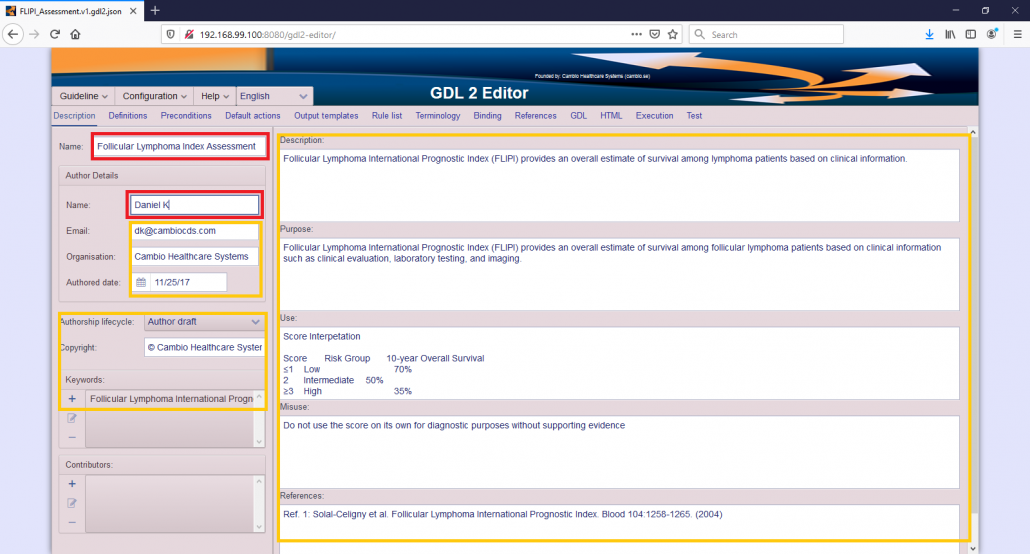
- Fill in the Description tab. You need to fill in the name of the guideline and author’s name. The other fields are optional, but recommended, unless you use it for your own learning purposes only. A possible fill can be seen in the screenshot.
2. Instantiate Follicular Lymphoma international prognostic index archetype (with Total score element) as input.
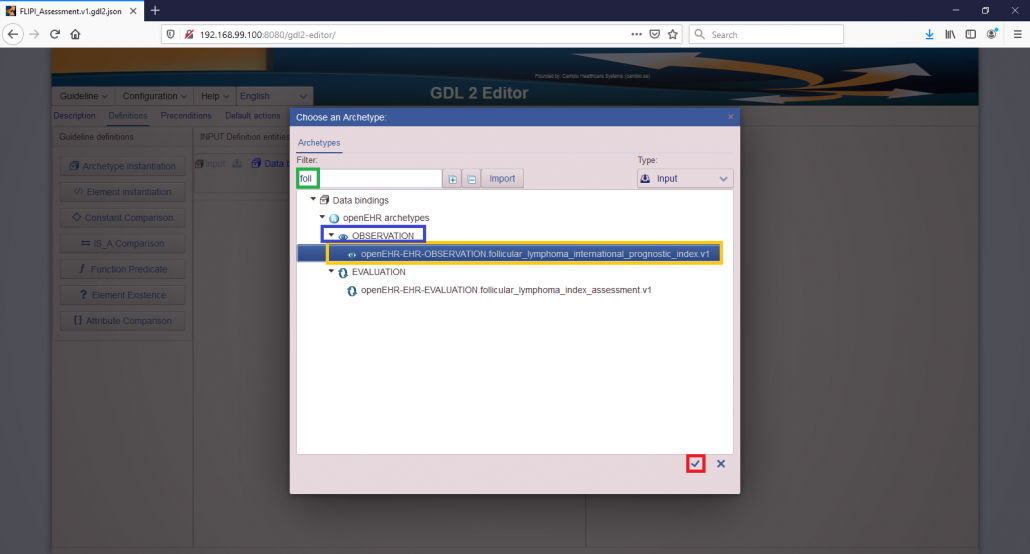
- Instantiate openEHR-EHR-OBSERVATION.follicular_Lymphoma_international_prognostic_index.v1 archetype. First dragging the archetype instantiation button, then in the archetype chooser dialog chosing the right archetype. In the dialog box, first start to type the name of the archetype in the filter field (e.g. type “foll”) and all the matching archetypes will appear in the dialog box. Make sure to choose the right one, it should appear below the OBSERVATION category.
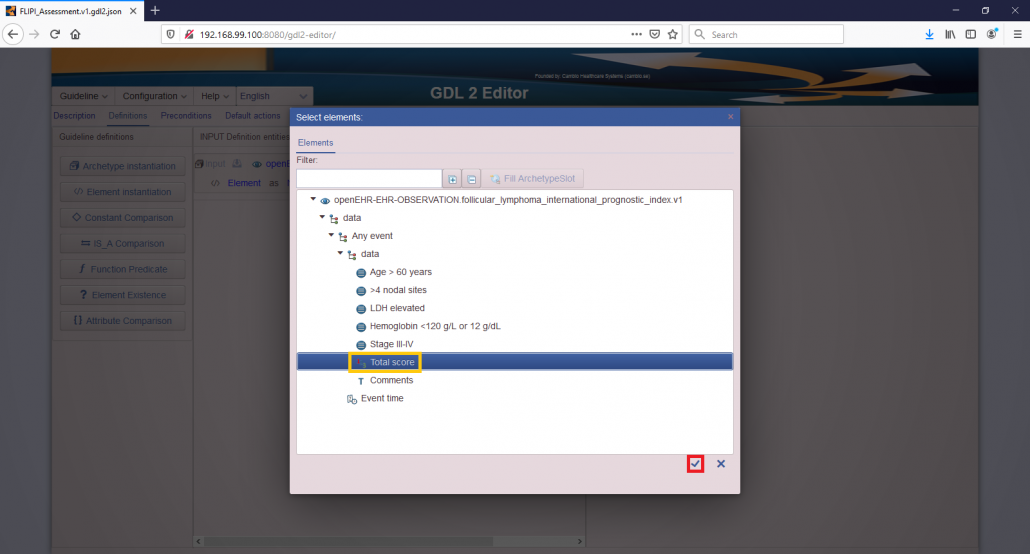
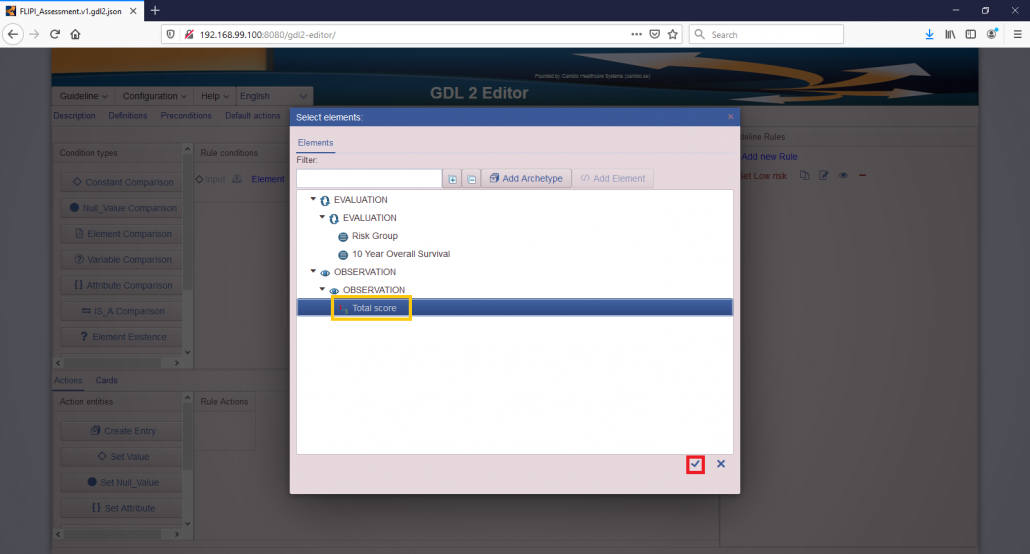
- Instantiate “Total score” as the input element by dragging the Element instantiation button to the newly created archetype. In the element selection dialog box, click on the line Total score and click on the check mark to confirm your selection.
3. Instantiate Follicular Lymphoma index assessment archetype (with Risk group and 10 Year Overall Survival element) as output.
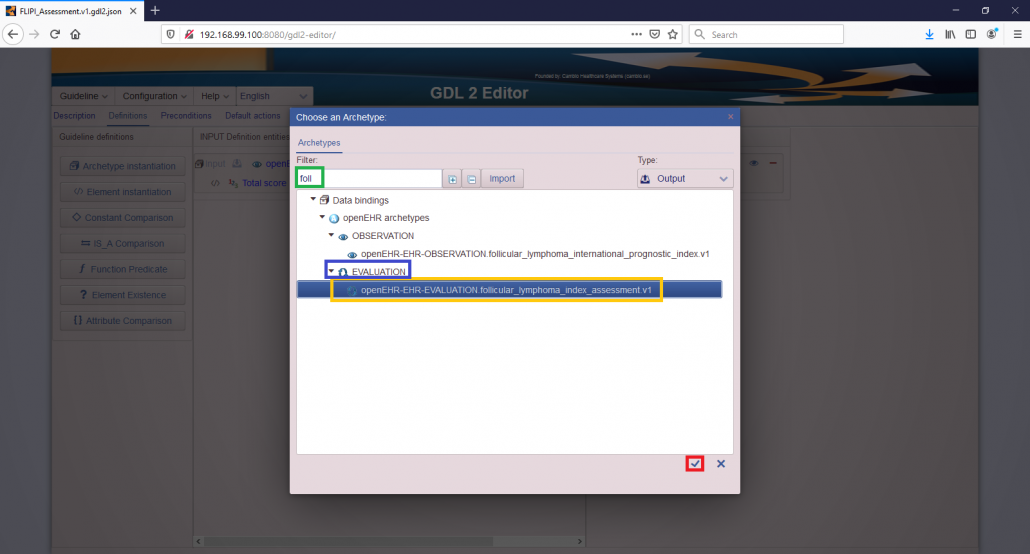
- Instantiate openEHR-EHR-OBSERVATION.follicular_Lymphoma_index_assessment.v1 archetype. First dragging the archetype instantiation button, then in the archetype chooser dialog chosing the right archetype. In the dialog box, first start to type the name of the archetype in the filter field (e.g. type “foll”) and all the matching archetypes will appear in the dialog box. Make sure to choose the right one, it should appear below the EVALUATION category. See screenshot for help.
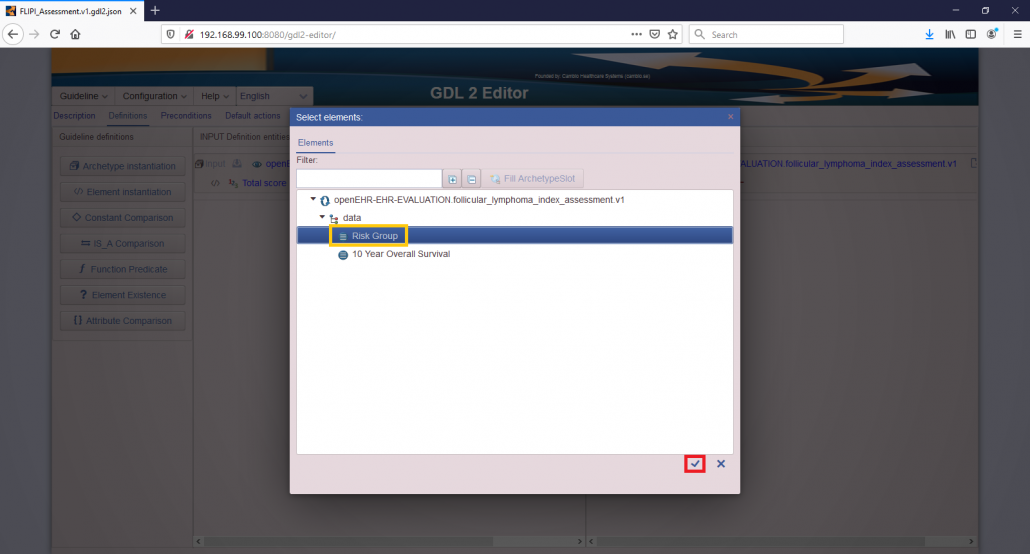
- Instantiate “Risk Group” as the output element by dragging the Element instantiation button to the newly created archetype. In the element selection dialog box, click on the line Total score and click on the check mark to confirm your selection.
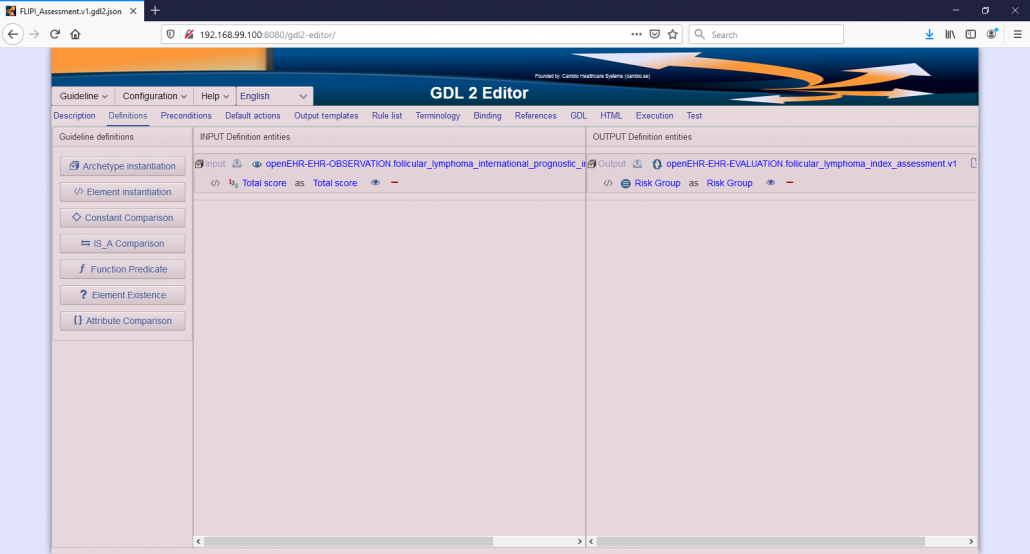
- After completing the previous steps, you should see the following screen. You should continue by instantiating the other element in the output.
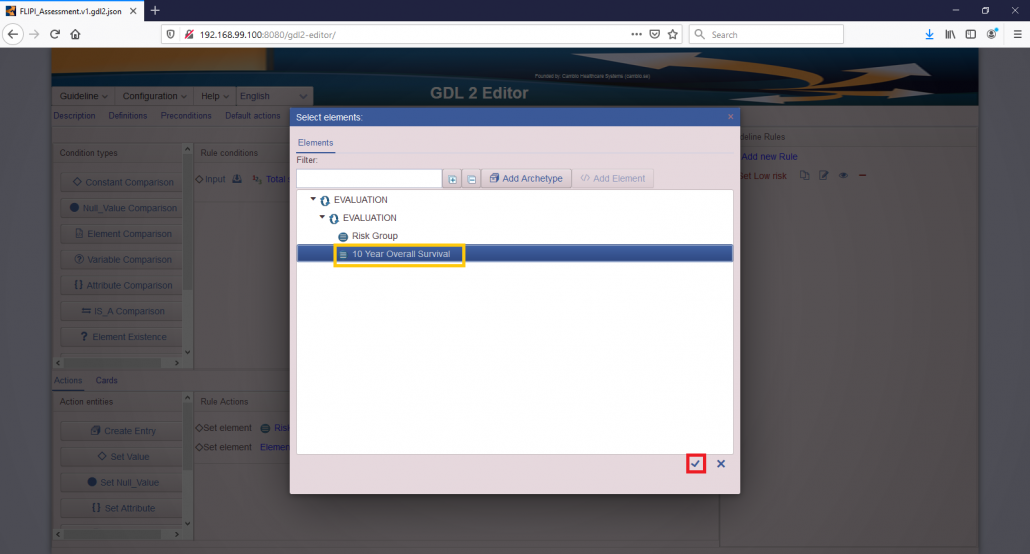
- Instantiate “10 Year Overall Survival” as the output element by dragging the Element instantiation button to the newly created archetype. In the element selection dialog box, click on the line Total score and click on the check mark to confirm your selection.
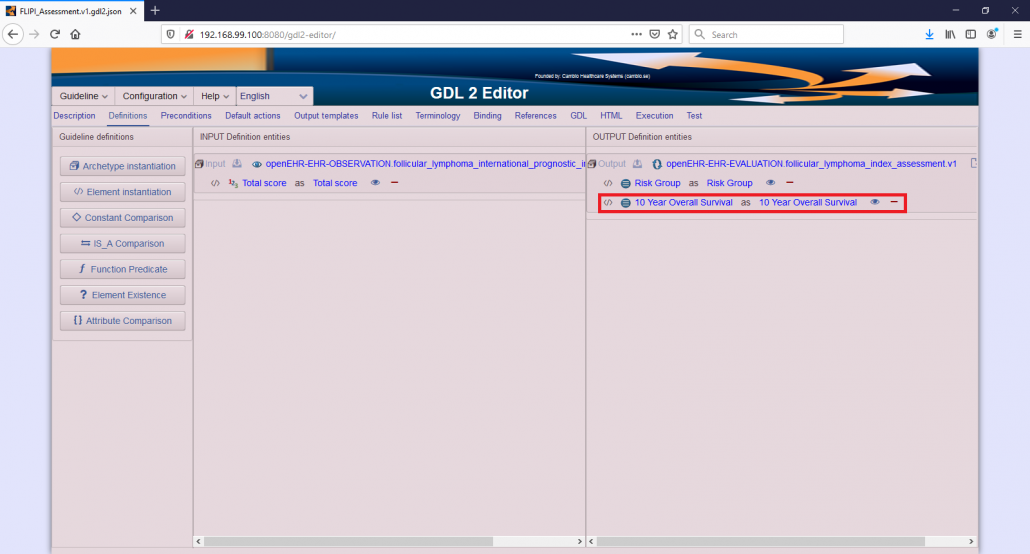
- After instantiating all the output elements, you should see the following screen.
4. Create 3 rules, each rules corresponding to each risk group. Each rule compares the Total score with a constant, and assigns the Risk group and survival rate accordingly.
- Add a new rule named “Set low risk” and add a Constant comparison condition by dragging the button to the Rule conditions field.
- Click on the Element label and in the usual dialog box, select Total score element, and confirm your selection by clicking the check mark.
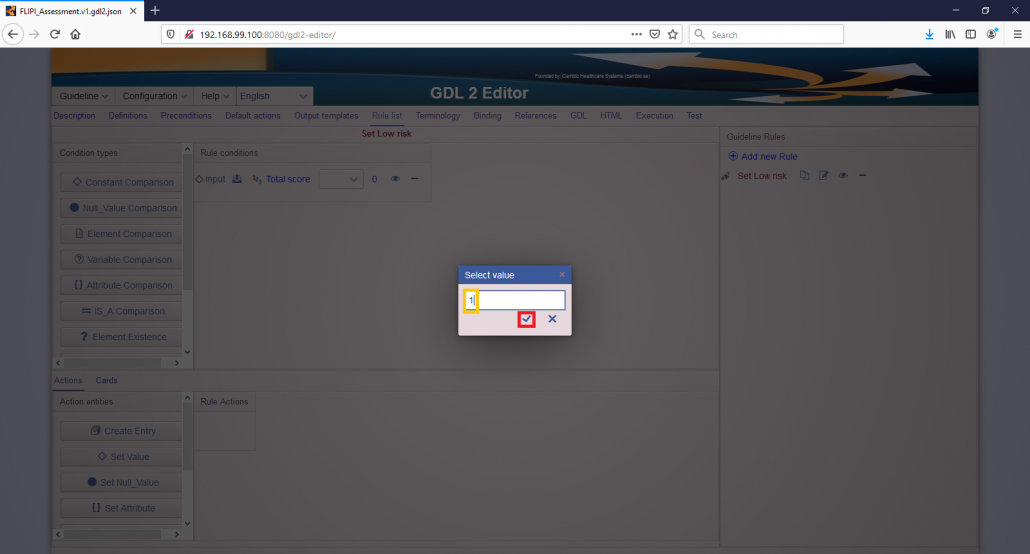
- Choose 1 as the value for comparison.
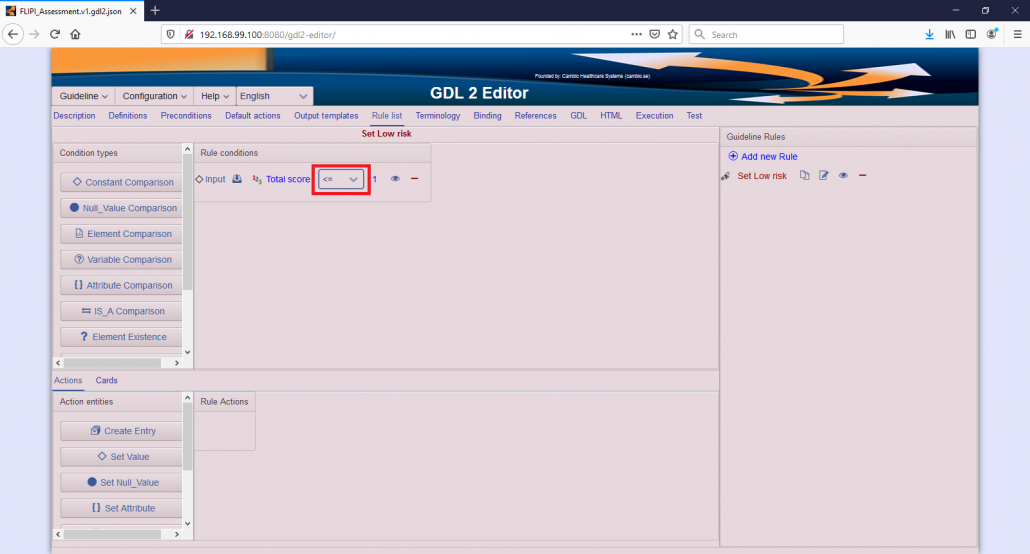
- Select “>=” in the drop-down list and .
- Add a Set element action by dragging the button to the Rule conditions field.
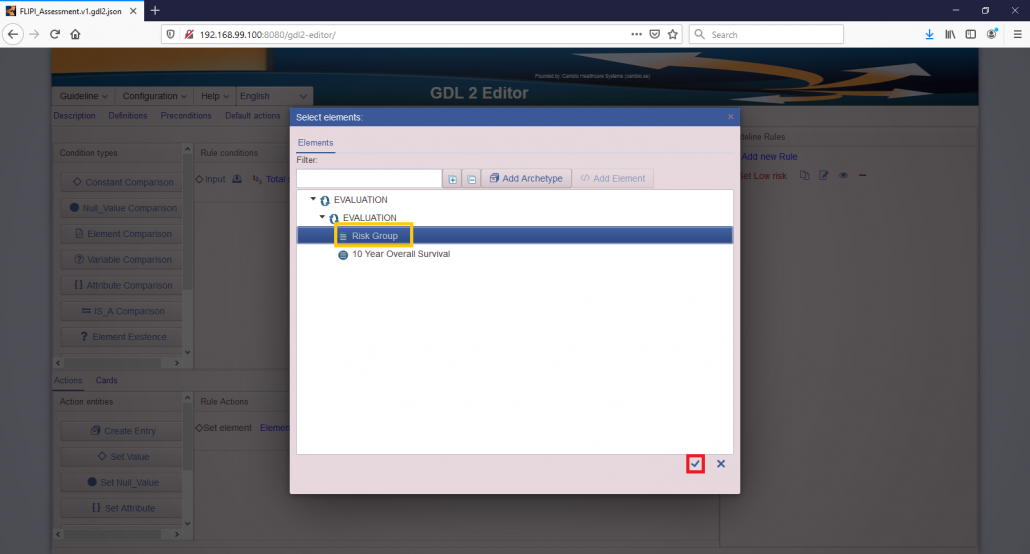
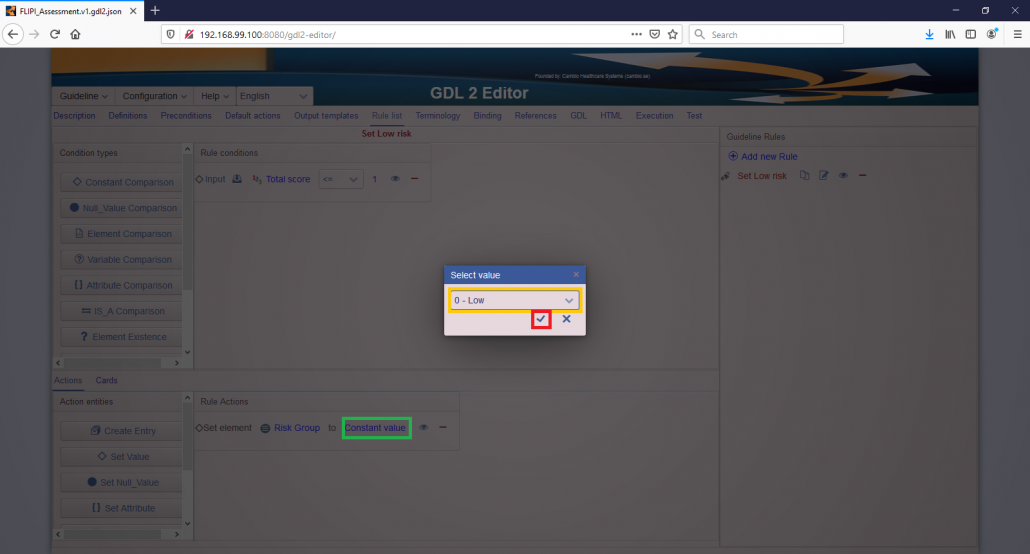
- Click on the Element label. In the usual dialog box choose the element to be set by the first rule action. You should choose “Risk Group” and confirm your selection by clicking the check mark.
- Click on the “Constant” label. This will show the dialog box shown in the screenshot. Choose “0 – Low” value from the drop-down list and then click on the check mark to confirm your choice.
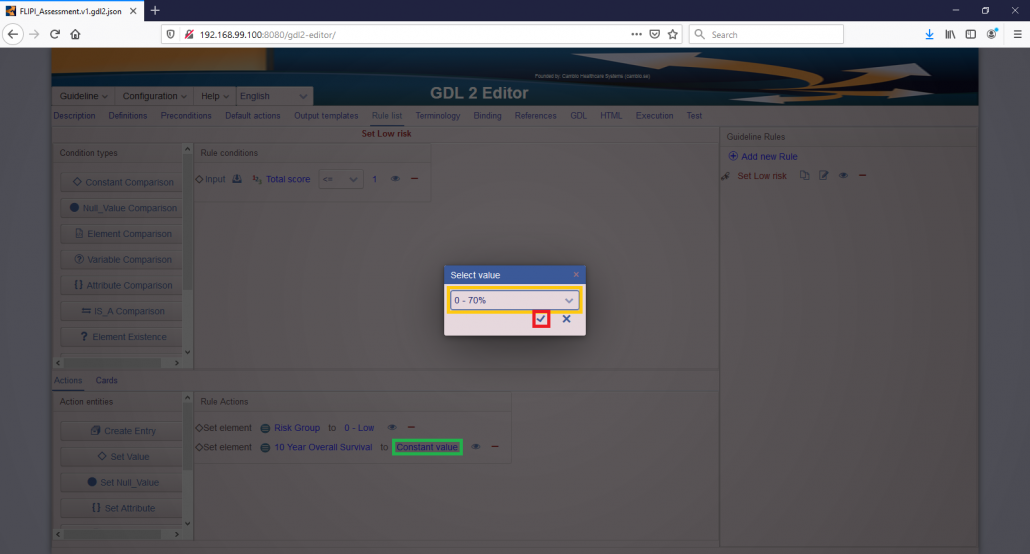
- Add a second Set element action. Here, in the usual dialog box choose “Risk group” and confirm your selection by clicking the check mark.
- Click on the “Constant” label. This will show the dialog box shown in the screenshot. Choose “0 – 70%” value from the drop-down list and then click on the check mark to confirm your choice.
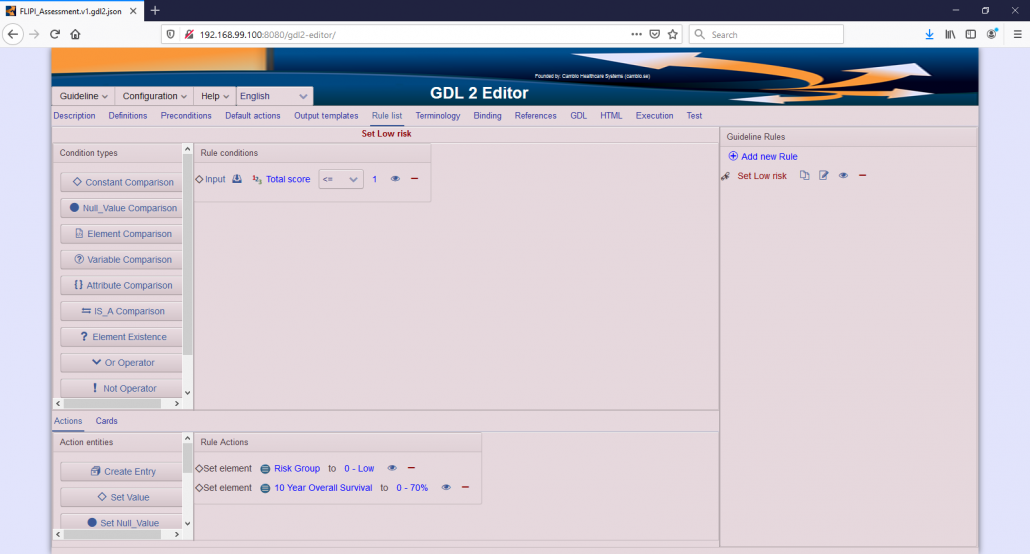
- You should see the following screenshot after adding the second rule action.
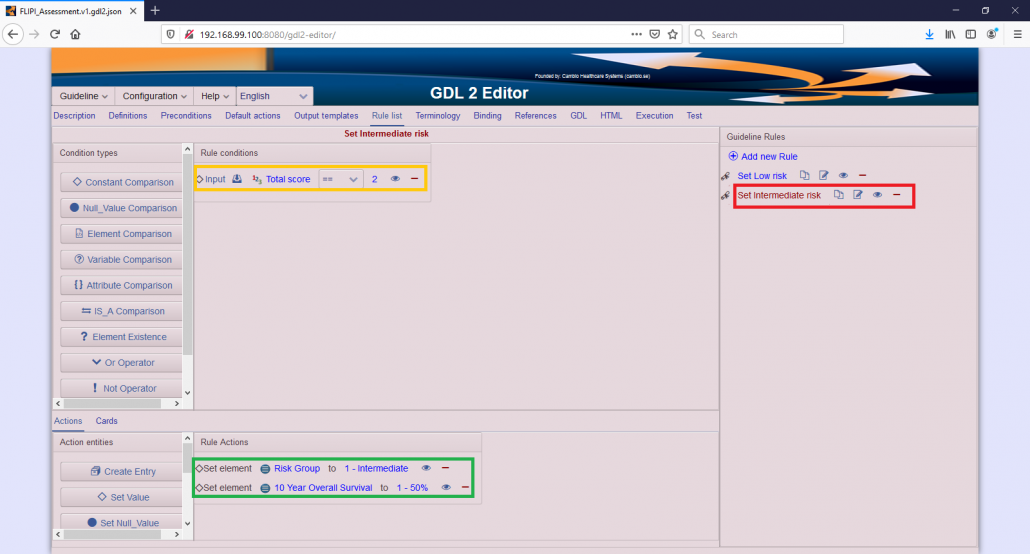
- Similarly to the previous rule. Add a second rule, name it “Set Intermediate risk”, add a condition that Total score equals 2 and add two rule actions: Setting the “Risk group” to “1 – Intermediate” and “10 Year Overall Survival” to “1 – 50%”
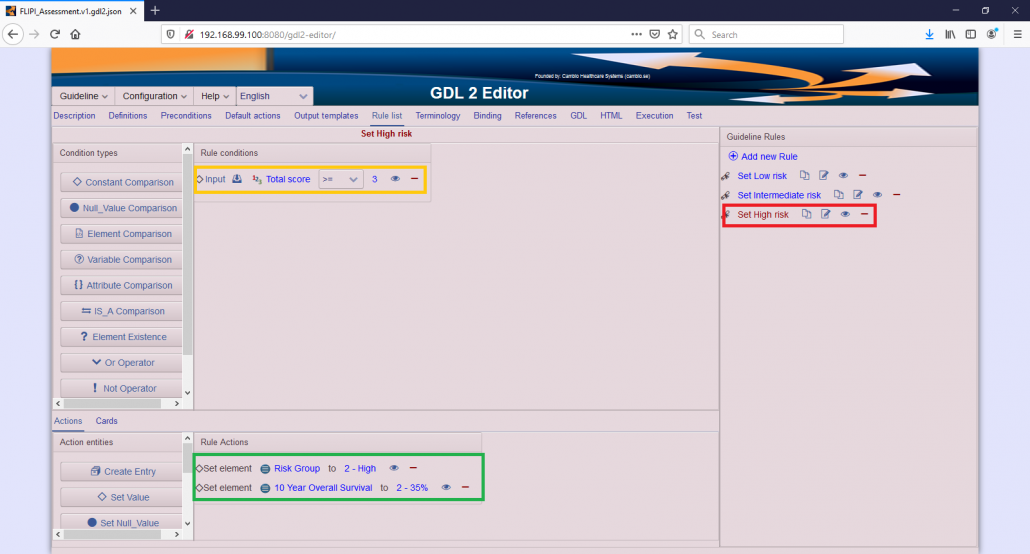
- Add a third rule, name it “Set Intermediate risk”, add a condition that Total score larger or equal to 3 and add two rule actions: Setting the “Risk group” to “2 – High” and “10 Year Overall Survival” to “2 – 35%”.


4. Check your guideline in the Execution tab.
Now, you are done with your guideline, but first make a quick check that everything works fine.
- Open the Execution tab.
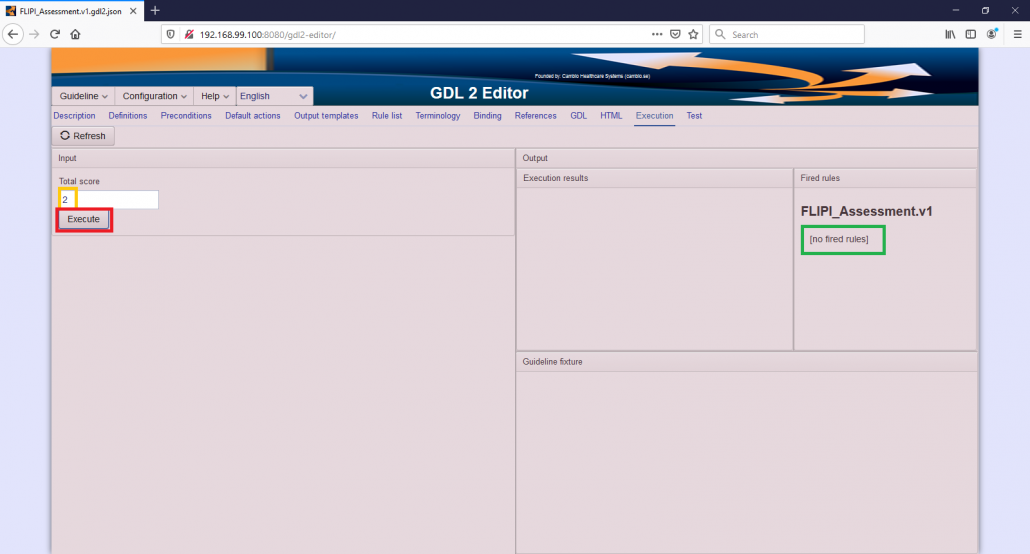
- Fill in the Total score input with a meaningful number.
- Click on the Execution button.
- The output will be displayed in the corresponding field and can be copied to the Test tab.
- If you enter “2” an unexpected behavior is seen. In some cases (i.e. when a condition with “==” is used) you do not get the expected output when entering an input (here: 2 corresponding to the Intermediate risk case). Instead, in the fired rules field you will see that no rules were fired. Although this is an unexpected behavior, it is a known bug, which will be fixed soon.

5. Save your guideline.
- If everything works as intended, we recommend to save your guideline.
- Save your guideline with the name “FLIPI_Assessment.v1”
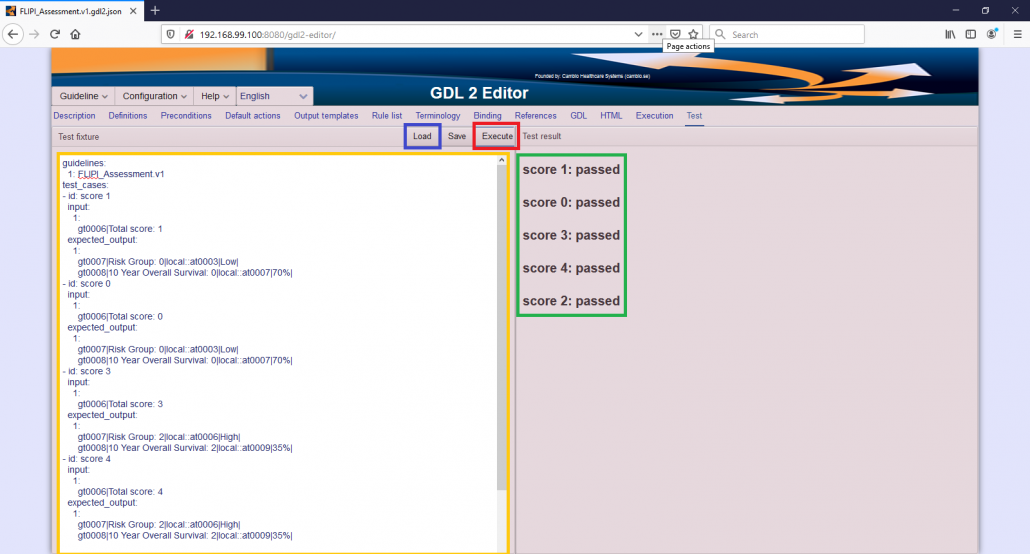
6. Test your guideline with a test file.
- Open the Test tab.
- Load a test file click on the Load button in the Test tab.
- This will load the test file. The content of the loaded test file will show up in the Test fixture field.
- You can Execute the test file by clicking on the Execute button.
- he result of the test will show up in the Test result field. If everything is alright, you should have all test results passed. Here, the Intermediate risk group should also work.