GDL2 Guideline Tutorial V – FLIPI (updated)
A common procedure in healthcare is to calculate scores from the clinical presentation and other health parameters. These scores then can be used to prioritize patients, to define patient groups, to calculate mortality or other risks. This and the next chapter explains how to create guidelines calculating these scores using the example of the Follicular Lymphoma International Prognostic Score and the successive assessment determining the patient group and mortality risk from the previously calculated score.
The Follicular Lymphoma International Prognostic Score – as many other scores in medicine – is made up by summing subscores to a total score. In this case, there are 5 subscores, which can be either 1 or 0 dependending if the patient is considered being in the risk group according to each criteria. The criteria here are:
- Haemoglobin below 120 mg/L
- Elevated LDH
- Age over 60 years
- Whether the patient is considered being in Stage III or IV, where stage III is a disease involves both sides of the diaphragm, including one organ or area near the lymph nodes or the spleen. In stage IV, diffuse or disseminated involvement of one or more extranodal organs is present, with or without associated lymph node involvement.
- More than 4 nodal sites
1. Start a new guideline, import the archetypes, and name the new guideline as "Lymphoma International Prognostic Score".
- To start to create the guideline, open the GDL Editor if not already open (if help needed refer to the previous chapters).
- Import all archetypes by importing archetypes.zip file
- If you have another guideline open, click on the Create New Guideline item in the menu to start an empty guideline.
- Import all archetypes by importing archetypes.zip file
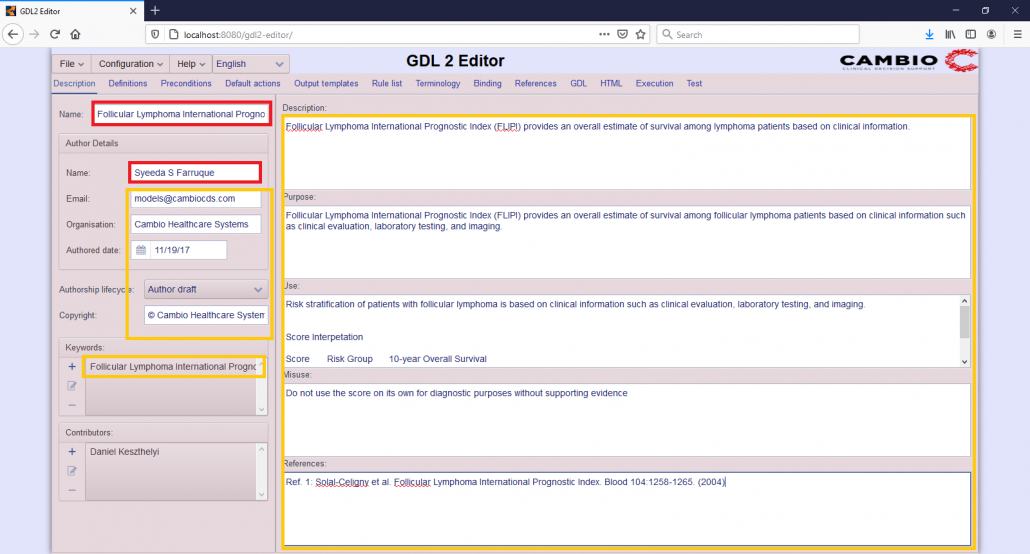
- Fill in the Description tab. You need to fill in the name of the guideline and author’s name. The other fields are optional, but recommended, unless you use it for your own learning purposes only. A possible fill can be seen in the screenshot.
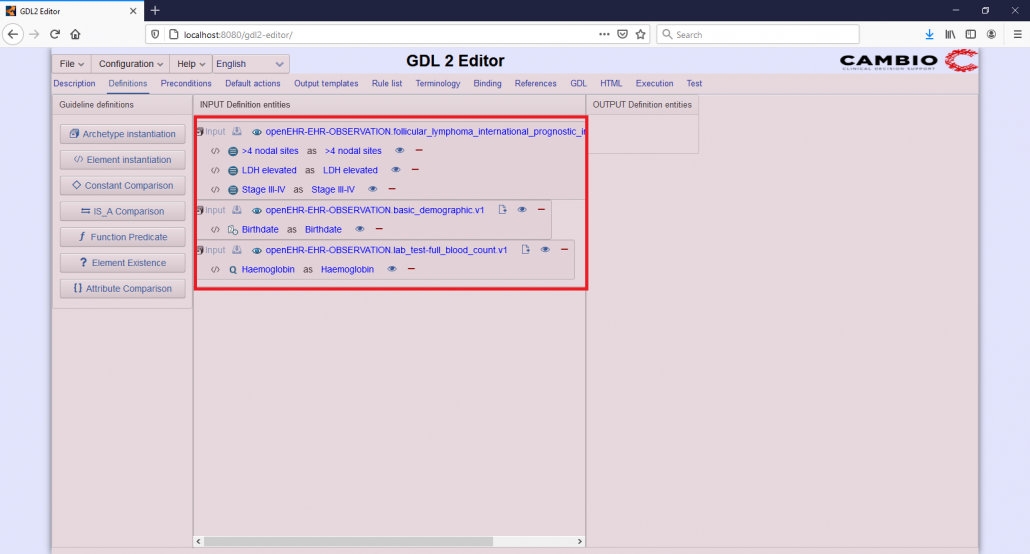
2. Instantiate Follicular Lymphoma international prognostic index (with elements >4 nodal sites, LDH elevated and Stage III-IV), Basic demography (with element Birthdate) and Lab test full blood count (with element Haemoglobin) as inputs, and Lymphoma international prognostic index (with all subscores), Basic demography (with element Age) as outputs.
- First, instantiate the input archetypes by dragging every time the Archetype instantiation button to the Input entities field and choosing the relevant archetype.
- In the Follicular Lymphoma international prognostic index archetype (openEHR-EHR-OBSERVATION.follicular_Lymphoma_international_prognostic_index) instantiate the following elements: >4 nodal sites, LDH elevated and Stage III-IV
- In the Basic demography (openEHR-EHR-OBSERVATION.basic_demography) archetype instantiate the Birthdate element
- In the Lab test full blood count (openEHR-EHR-OBSERVATION.lab_test-full_blood_count) archetype instantiate the Haemoglobin element.
- After instantiating all the elements you should see the same screen as in the screenshot. If confused, skip to the next steps instantiating the output archetypes and elements, and then come back to this step following the details there.
- Add a new empty archetype to the output by dragging the Archetype instantiation button to the Output entities field.
- Click on the Data binding label
- You will see the dialog box shown in the screenshot, after dragging the Archetype instantiation to the outputs field and clicking on the Data binding label. Search for basic_demography archetype by entering part of its name into the Filter input field. From the search results choose openEHR-EHR-OBSERVATION.basic_demography (the archetype without anything after “demography”) and then click on the check mark to confirm your selection.
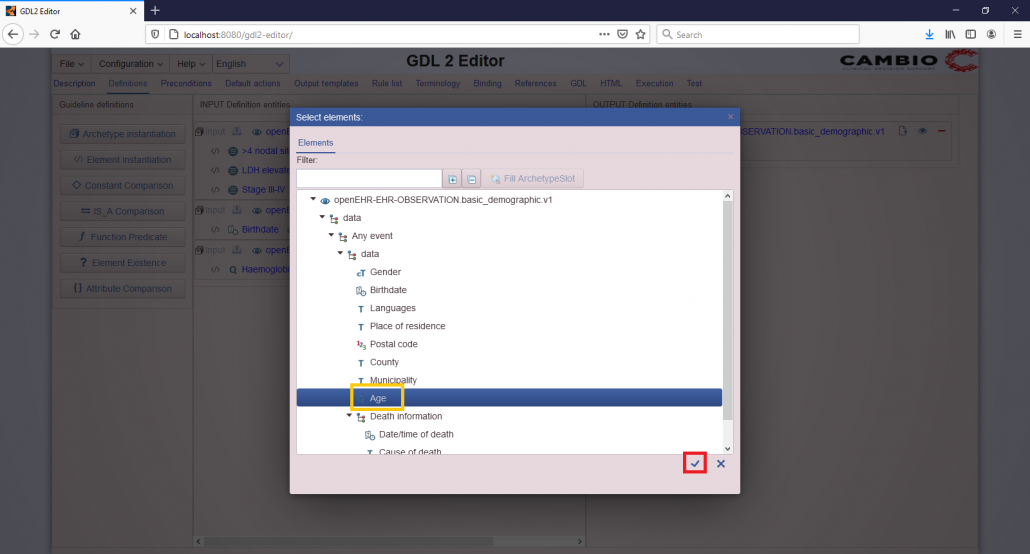
- Drag the Element instantiation button to the newly created archetype instance.
- Click on the Element label.
- You will see the dialog box shown in the screenshot. Select Age element and then click on the check mark to confirm your selection.
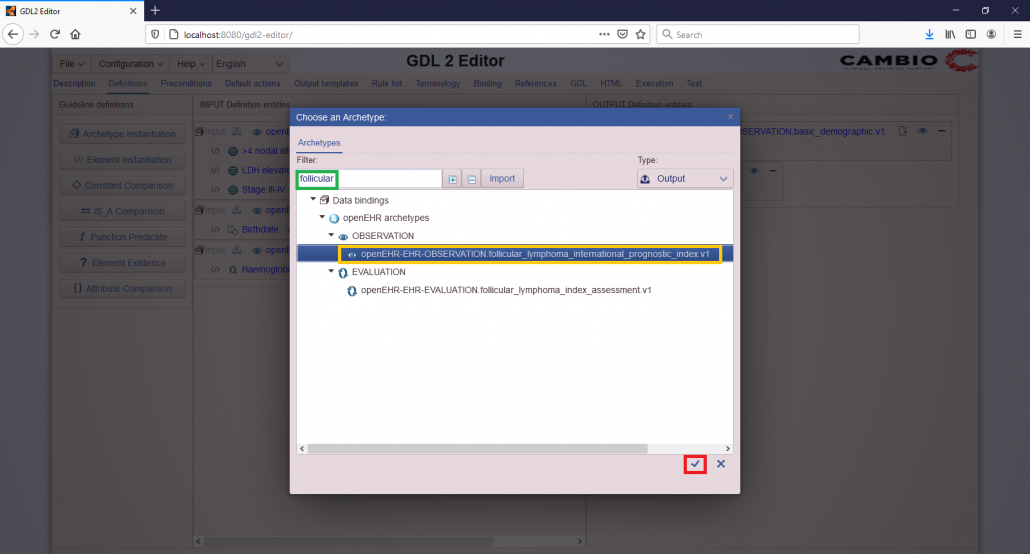
- Add yet another empty archetype to the output by dragging the Archetype instantiation button to the Output entities field and then click on the Data binding label
- You will see the dialog box shown in the screenshot. Search for follicular_Lymphoma_international_prognostic_index archetype by entering part of its name into the Filter input field. From the search results choose the correct one (the archetype within the OBSERVATION category) and then click on the check mark to confirm your selection.
- Drag the Element instantiation button to the newly created archetype instance.
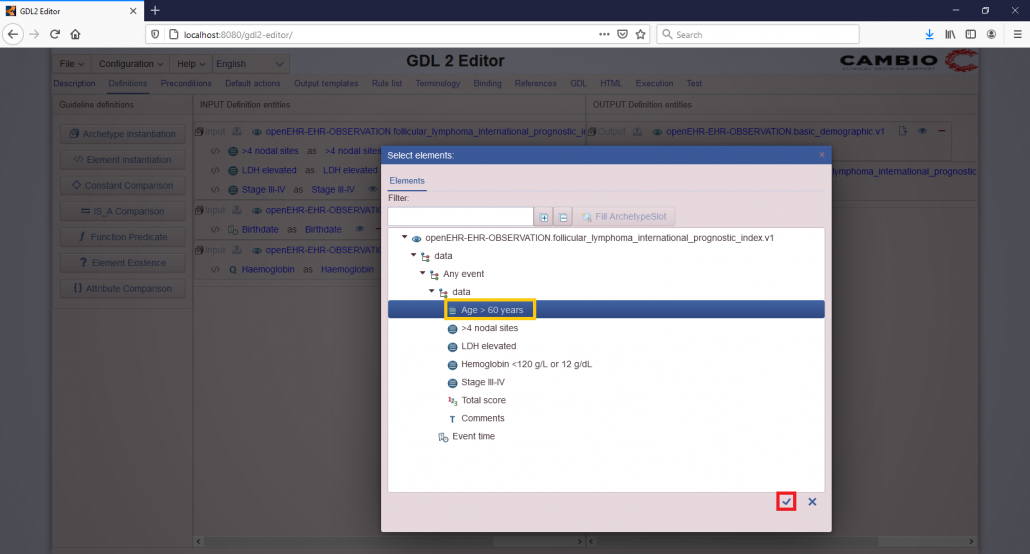
- Click on the Element label.
- You will see the dialog box shown in the screenshot. Select Age element and then click on the check mark to confirm your selection.
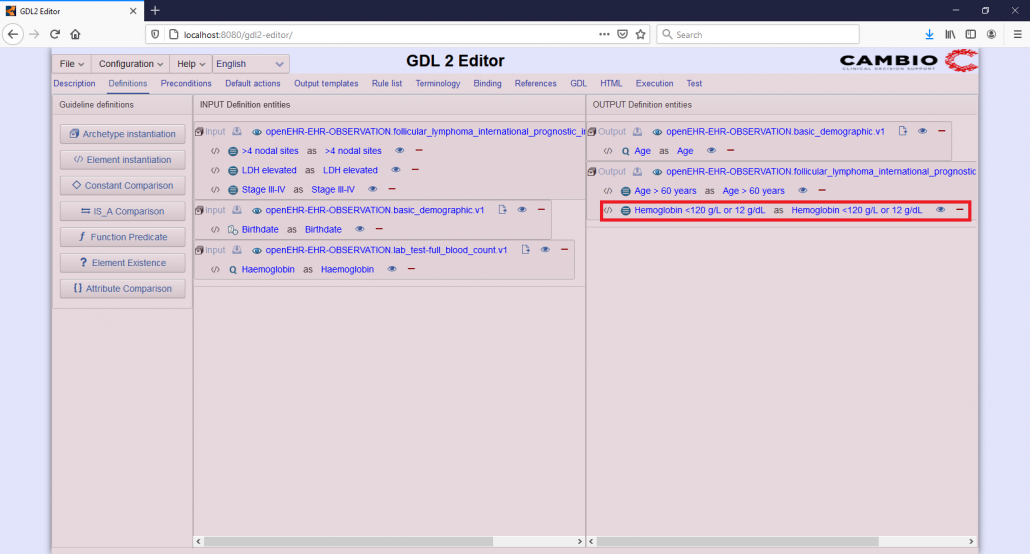
- Similarly to Age, you should instantiate the subscore Hemoglobin <120 g/L or 12 g/dL as well. After the instantiation you should see the following screen.
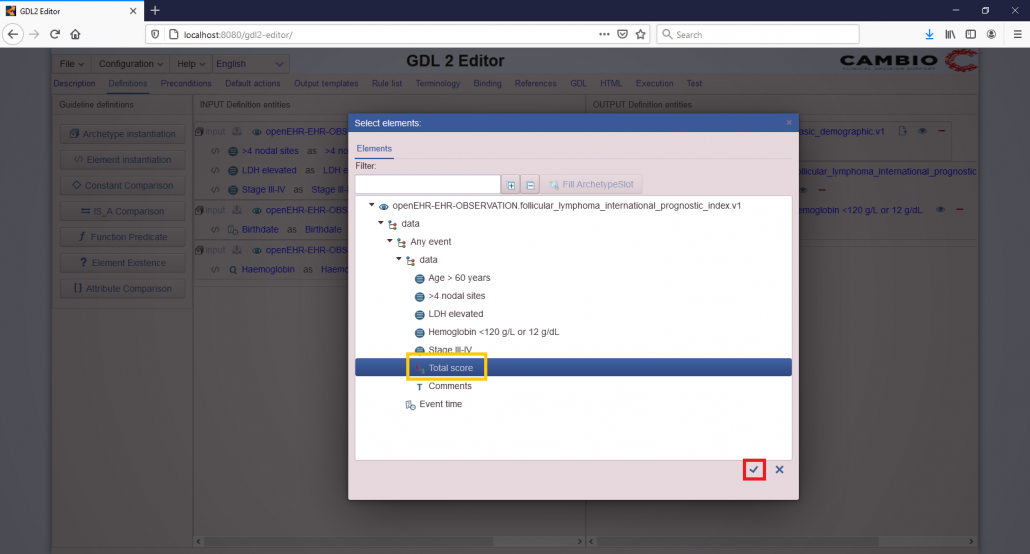
- After adding all subscores, you should instantiate the total score. Drag the Element instantiation button to the Lymphoma International Prognostic Index archetype and then click on the Element label.
- You will see the same dialog box as in the previous instantiations. Select Total score element and then click on the check mark to confirm your selection.
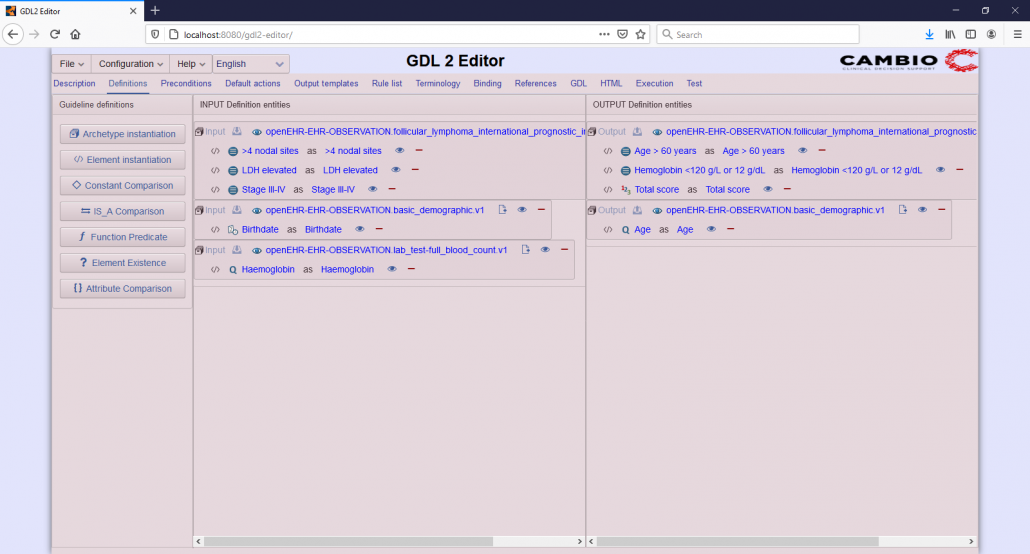
- After finishing all instantiation by adding Total score, you should see the following screen.

3. Add a rule called Calculate age, which checks whether Birthdate is present among the inputs, and then calculates age as the difference of the years between the current year and the year of birth.
- Open the Rule list tab.
- Create a new rule by clicking on the Add new rule label and typing its name: Calculate age.
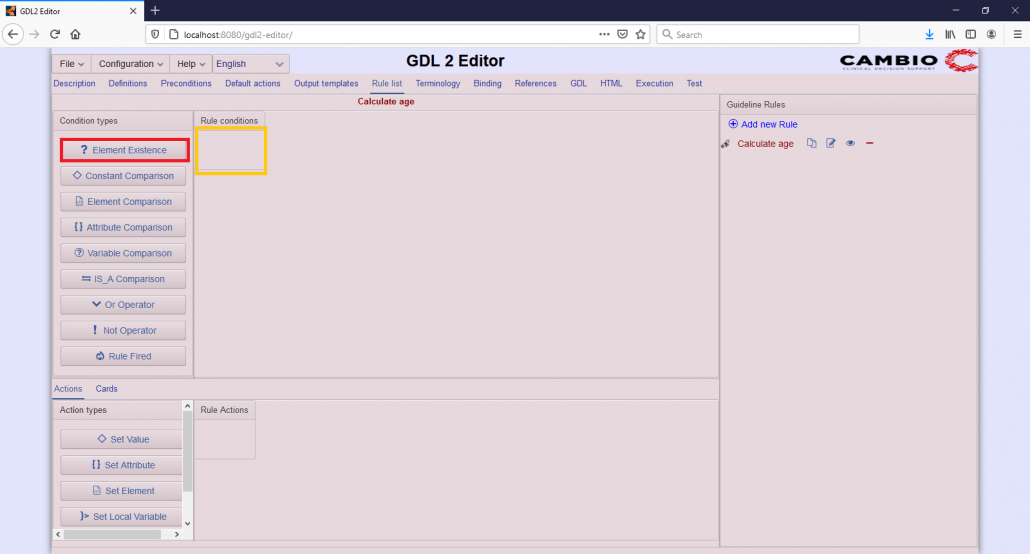
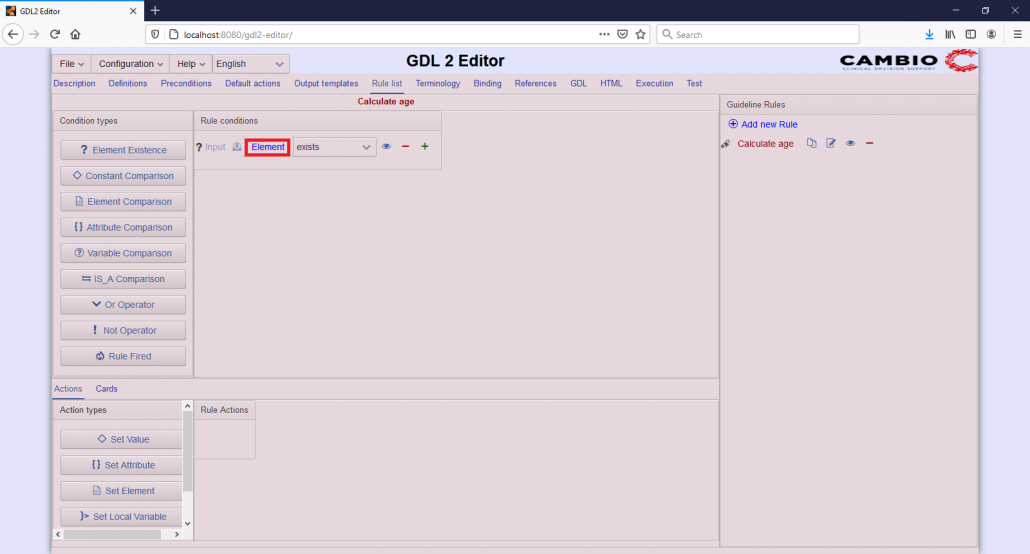
- Add a condition to the new rule. To start creating a condition for the first rule, add an Element existence condition by dragging the button to the Rule conditions field.
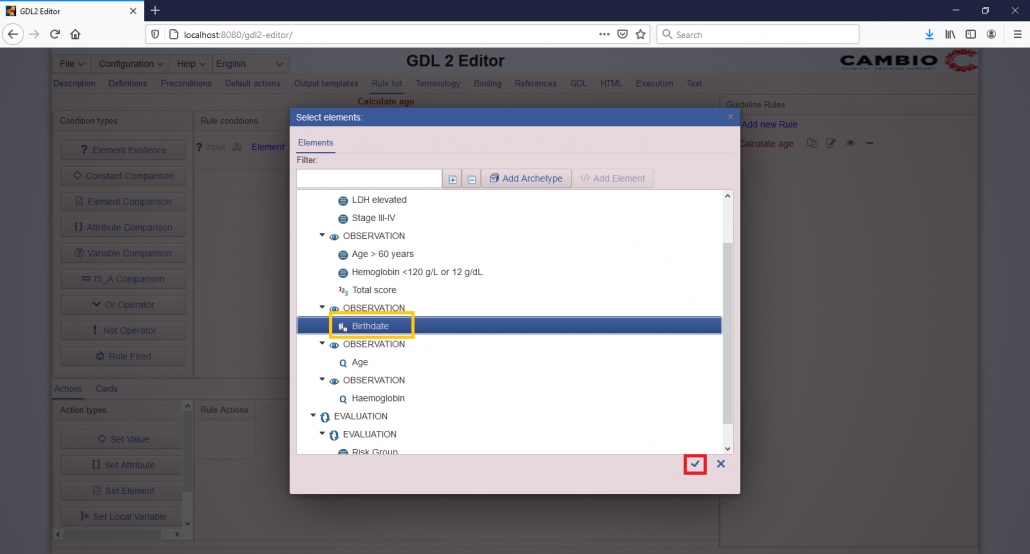
- To continue, click on the Element label to choose which Element to be checked for existence.
- A dialog box will show up to choose the element to be checked for existence. You should choose “Birthdate” and confirm your selection by clicking the check mark.
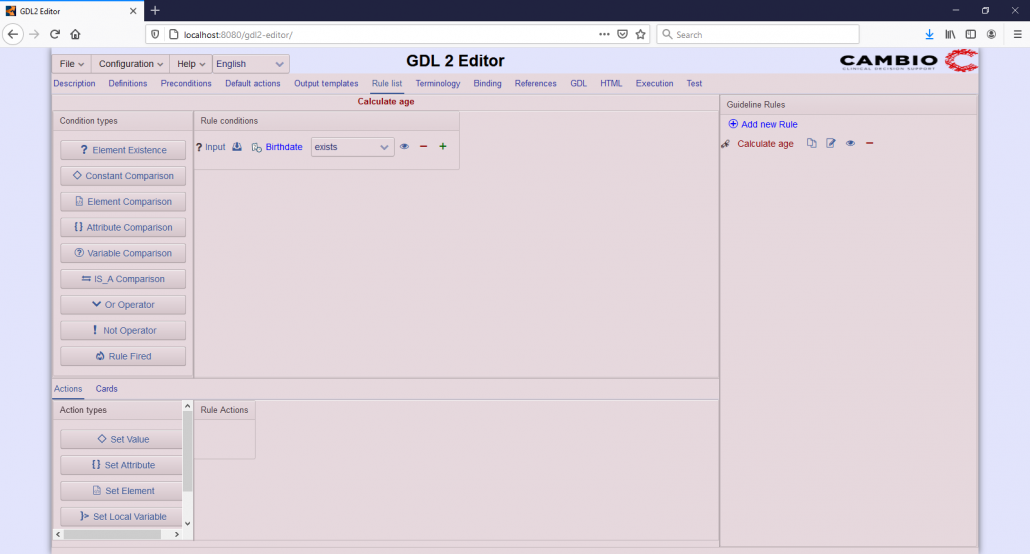
- Choose “exists” in the drop-down list inside the condition.
- After finishing the previous steps, you should see the following screenshot.
- Add an Attribute set rule by dragging the Set Attribute to Rule Actions field.
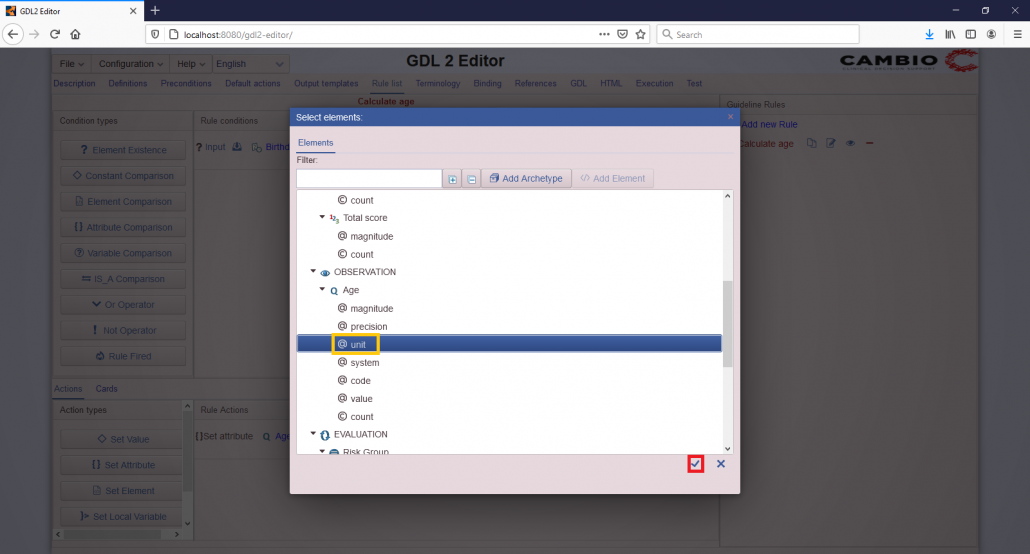
- Click on the Element label.
- The usual dialog box will appear to choose the element to be set by the first rule action. You should first choose “@unit” below the Age element, and confirm your selection by clicking the check mark.
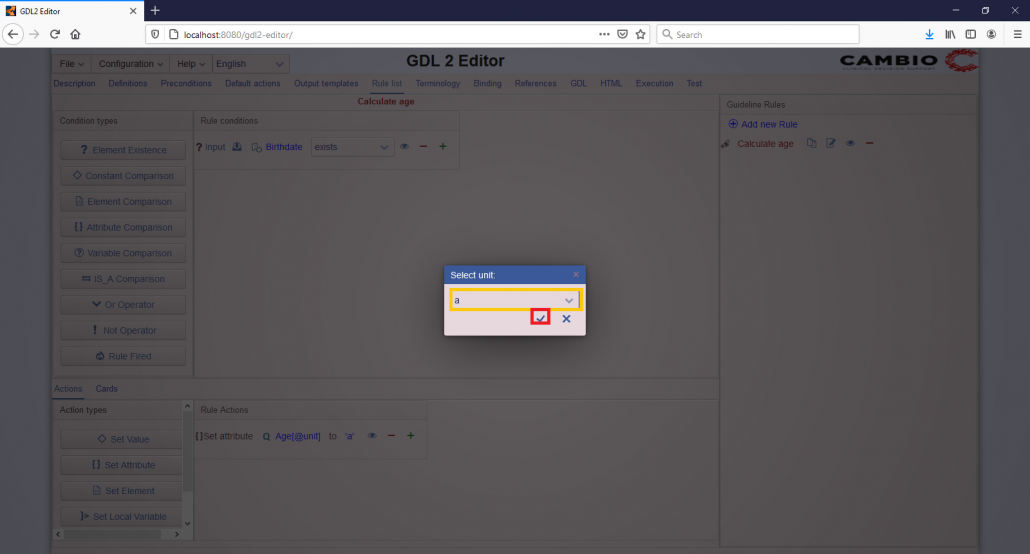
- Click on the “Constant” label.
- This will show the dialog box shown in the screenshot. Choose “a” (corresponding to “years” as unit) from the drop-down list and then click on the check mark to confirm your choice.
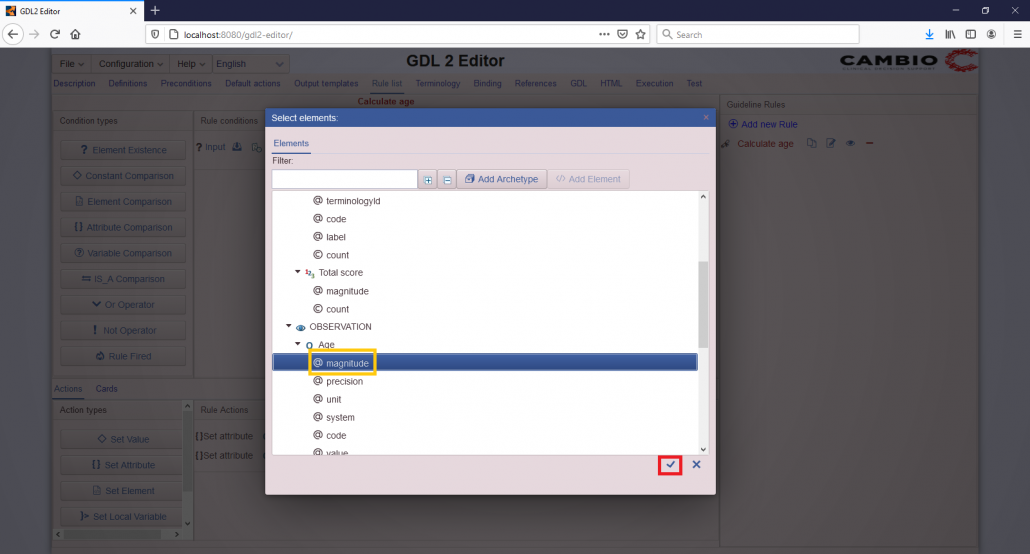
- Add another Attribute set rule to set the magnitude of the calculated age. Now, choose “@magnitude” below the Age element in the corresponding dialog box.
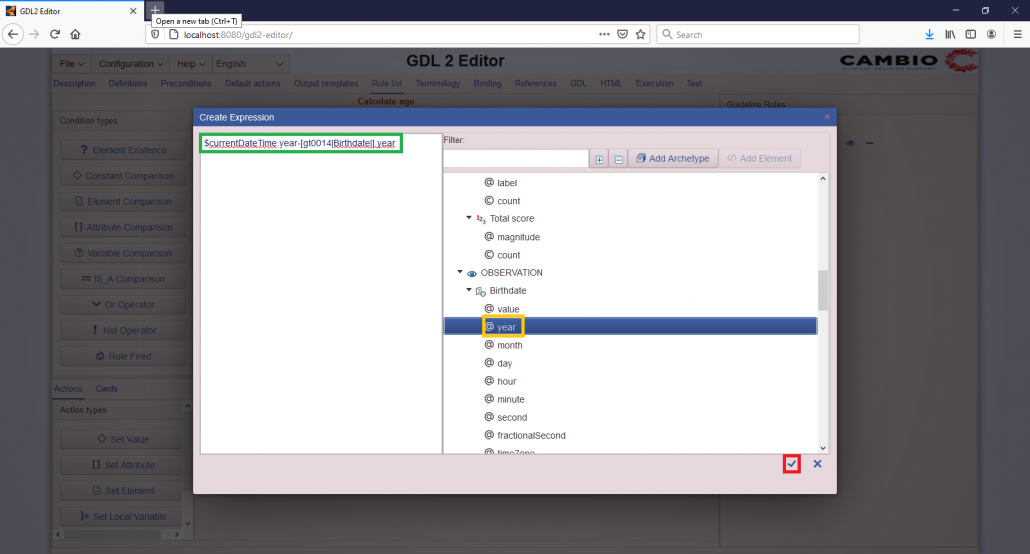
- Now, after clicking the Expression label, the expression editor will show up as you can see in the screenshot.
- You can edit the expression on the left side of the dialog box. You should double click @year below Age. After double clicking it, the [Birthdate].year expression shows up in the expression editor. You should add “$currentDateTime.year” and a minus sign (-) at the begining of the expression. Pay attention not to miss the “$” sign at the begining of the expression. The complete expression means, that age is calculated as the difference of the current year and the birthdate’s year. This is a first order approximation of calculating age, a more complex calculationis introduced in a later chapter. You should confirm the expression by clicking the check mark.
4. Add two rules which set the Age subscore according to the patient's age.
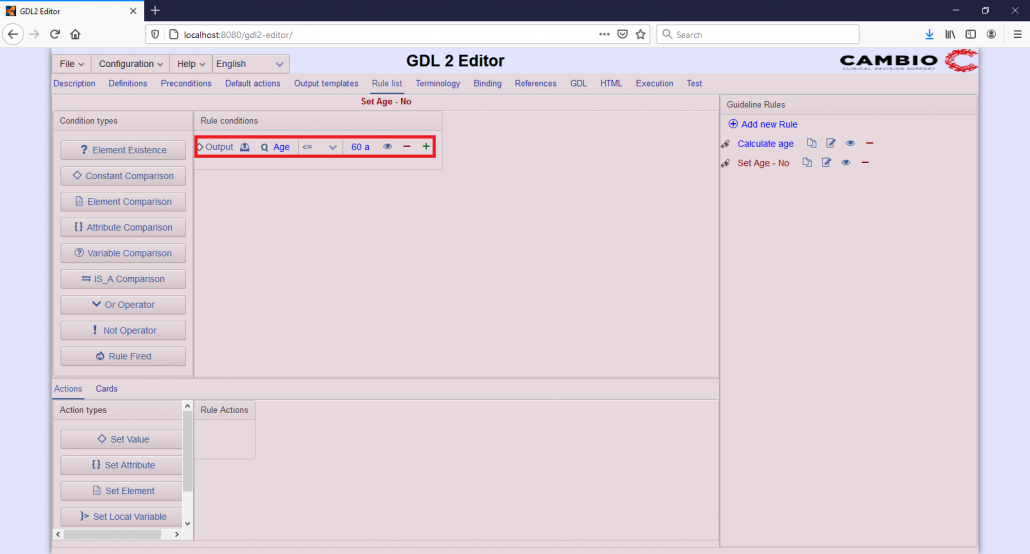
- First, add a new rule named “Set Age – No” corresponding to the case when patient is below 60 years. Click on the Add new Rule label, type the name “Set Age – No” and confirm by clicking the check mark.
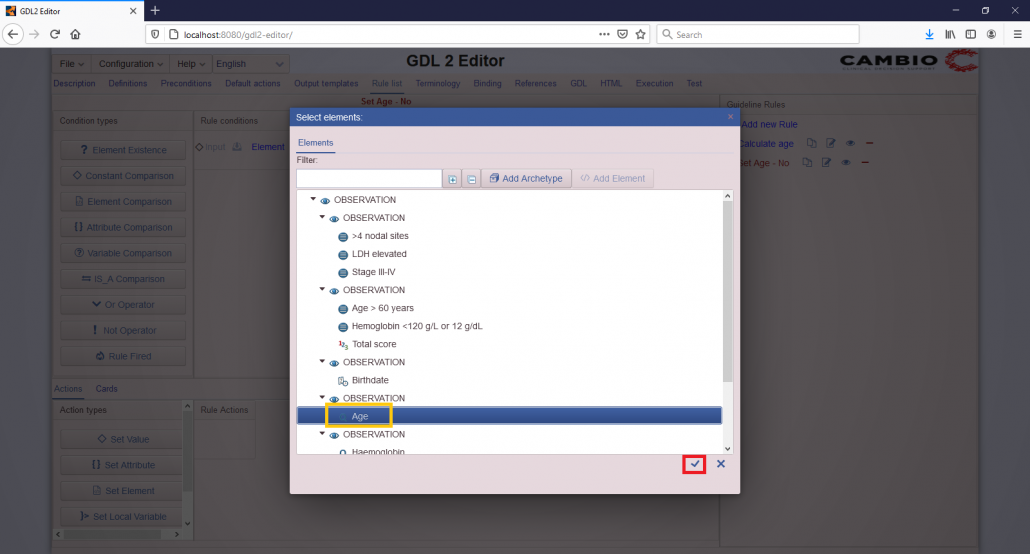
- Instantiate a constant comparision condition, then click on the Element label.
- In the usual dialog box, select Age inside the OBSERVATION group, and confirm your selection by clicking the check mark.
- Select “<=” in the drop-down list and choose 60 as the value for comparison.
- After finishing all the steps for adding the second rule condition, you should see the same condition as in the screenshot.
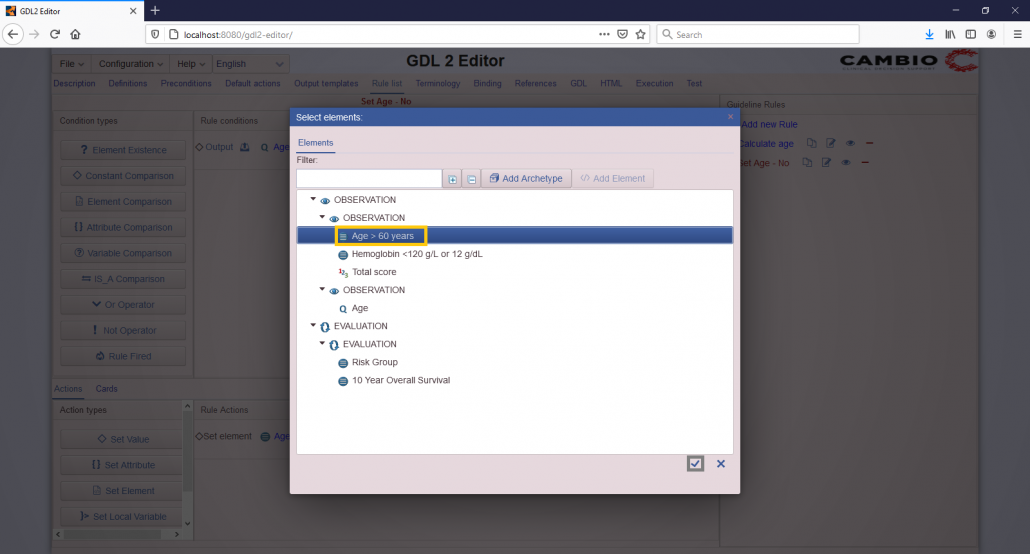
- Instantiate a Set Element rule, then click on the Element label.
- In the dialog box, you should choose “Age > 60 years” in the OBSERVATION group, and confirm your selection by clicking the check mark.
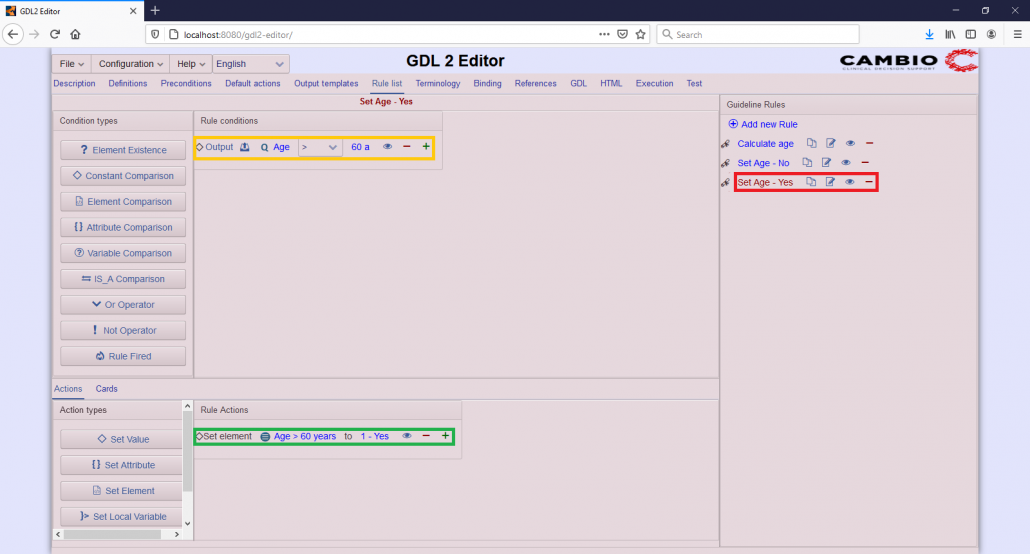
- Click on the Value label and in the dialog box select “0 – No” in the drop-down list, and confirm your selection by clicking the check mark.
- Create another very similar rule corresponding to the case when the patient is over 60 years. Name it “Set Age – Yes”. The difference here is that the relation in the constant comparision is “>”, and the Value in the rule action should be “1 – Yes”
- The other rule can be seen in the following screenshot.

5. Add rules setting the Haemoglobin subscore according to the patient's haemoglobin lab results.
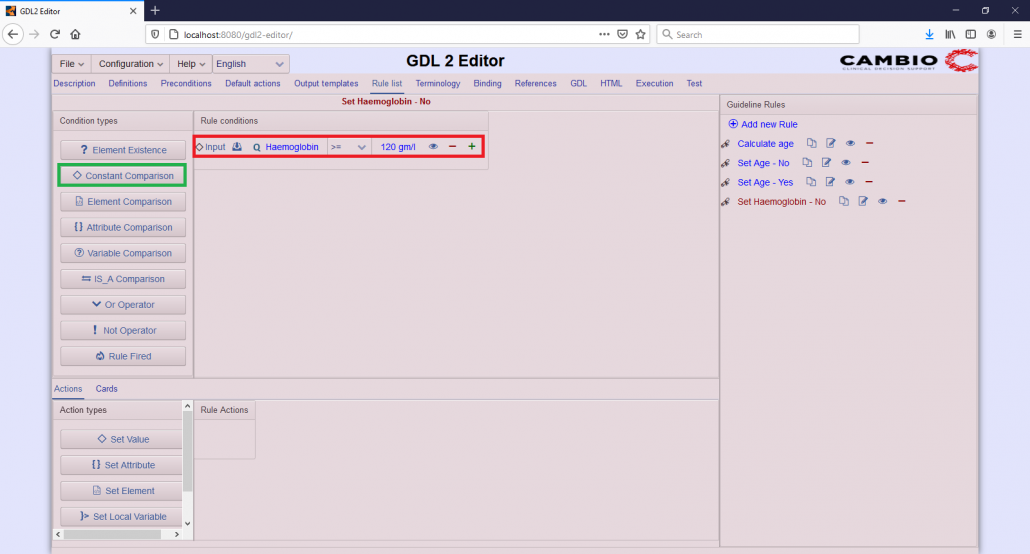
- Similarly, as in the previous step, add a new rule named “Set Haemoglobin – No” and instantiate a constant comparison condition.
- In the condition, set the element to be Haemoglobin, the relation to “greater or equal”, and the constant value to compare with to 120 gm/l.
- After setting all parameters, you should see the same as in the screenshot.
- Instantiate a Set Element rule, then click on the Element label.
- In the dialog box, you should choose “Hemoglobin < 120 g/L or 12 g/dL” in the OBSERVATION group, and confirm your selection by clicking the check mark.
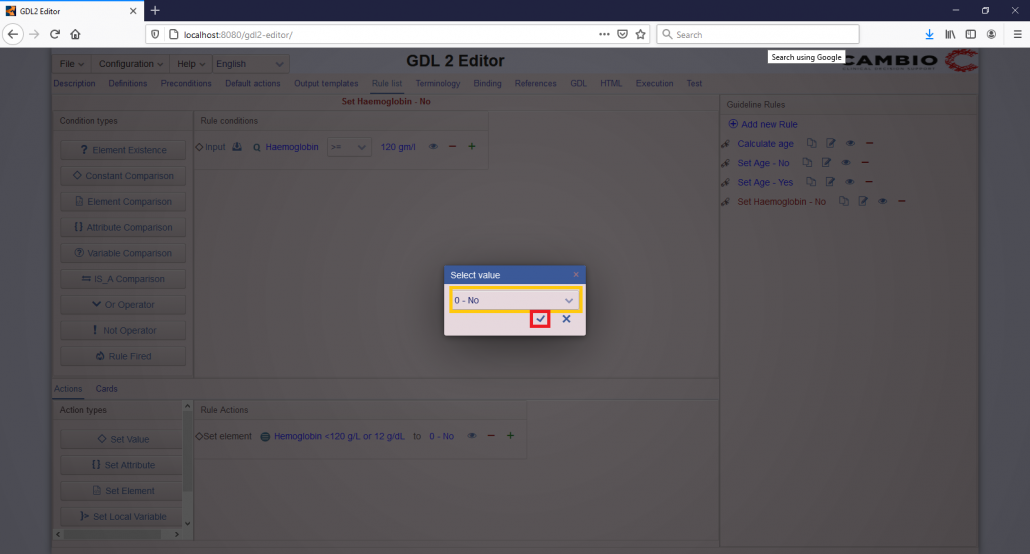
- Click on the Value label and in the dialog box select “0 – No” in the drop-down list, and confirm your selection by clicking the check mark.
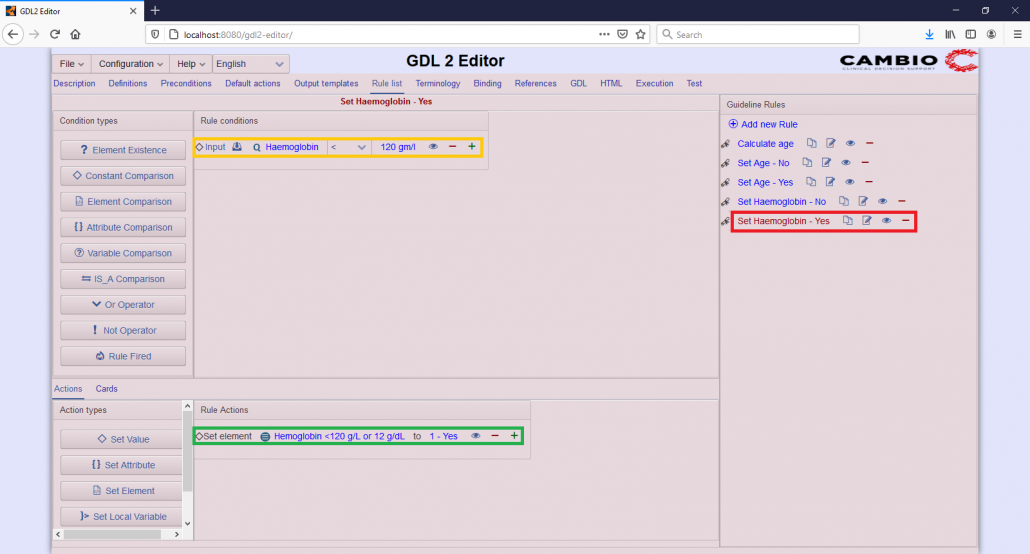
- Create another very similar rule corresponding to the case when the patient is over 60 years. Name it “Set Haemoglobin – Yes”. The difference here is that the relation in the constant comparision is “<“, and the Value in the rule action should be “1 – Yes”
- The other rule can be seen in the following screenshot.

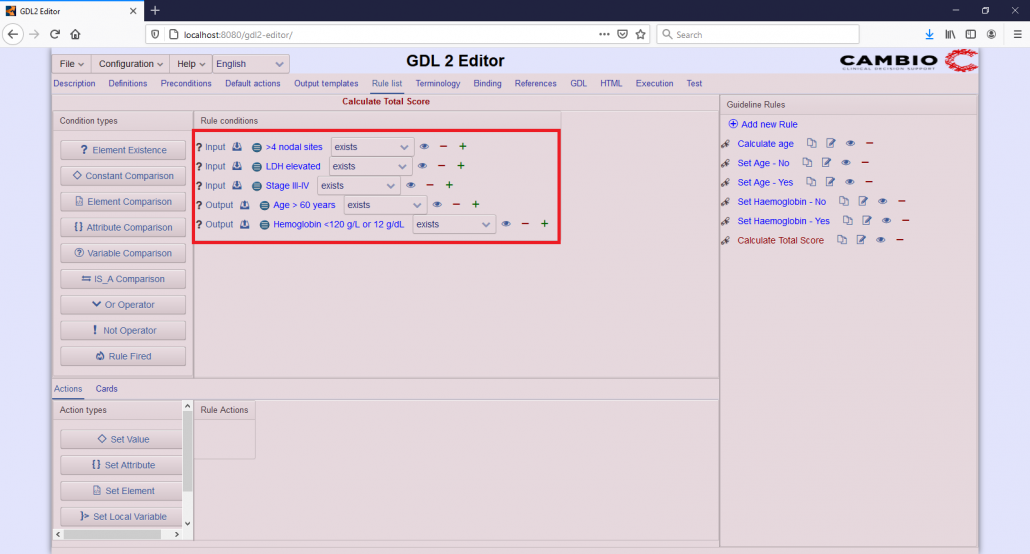
6. Add a last rule summing the subscores to the Total score (checking Element Existence).
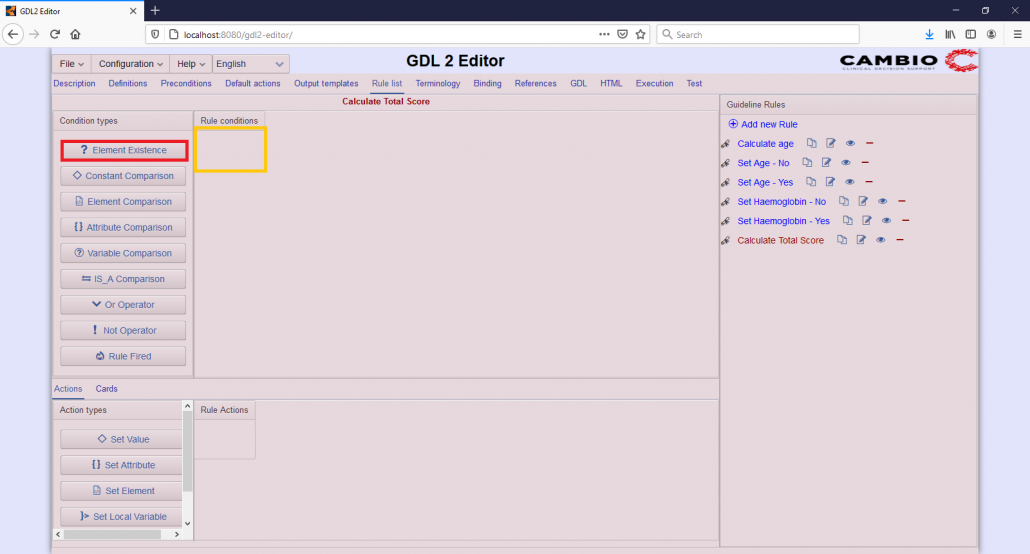
- Add a new rule named “Calculate Total Score”.
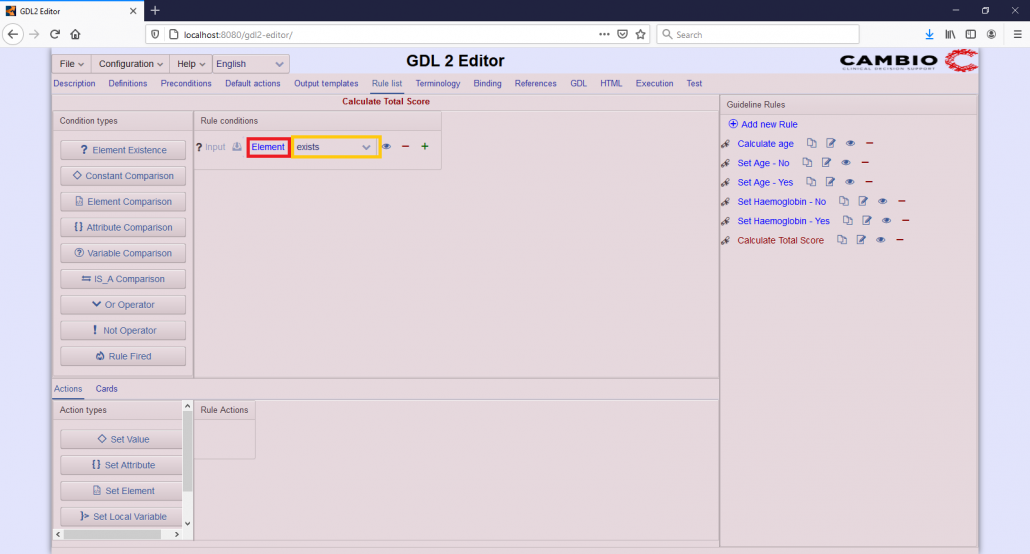
- Add an Element existence condition for the “>4 nodal sites” element by dragging the Element Existence button to the Rule conditions field and setting the Element to “>4 nodal sites”.
- Add Element existence condition for the other inputs as well. It is needed as the Editor has to make sure that all inputs used in the following rule are available.
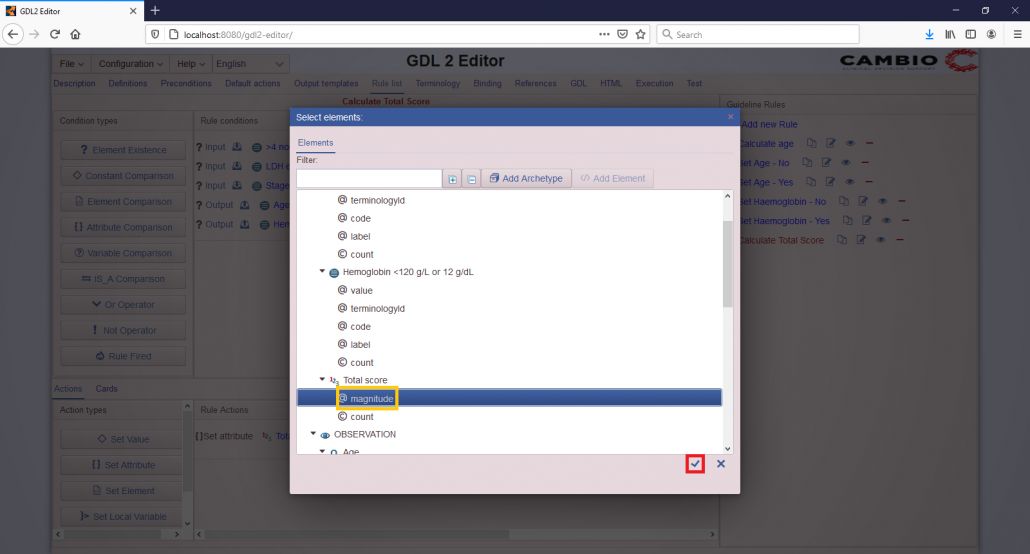
- Add a Set Attribute rule action to the rule, which will sum up the subscores to a Total score.
- Set the Element in the usual Choose Element dialog box. You should choose “@magnitude” below “Total score” element, and confirm your selection by clicking the check mark.
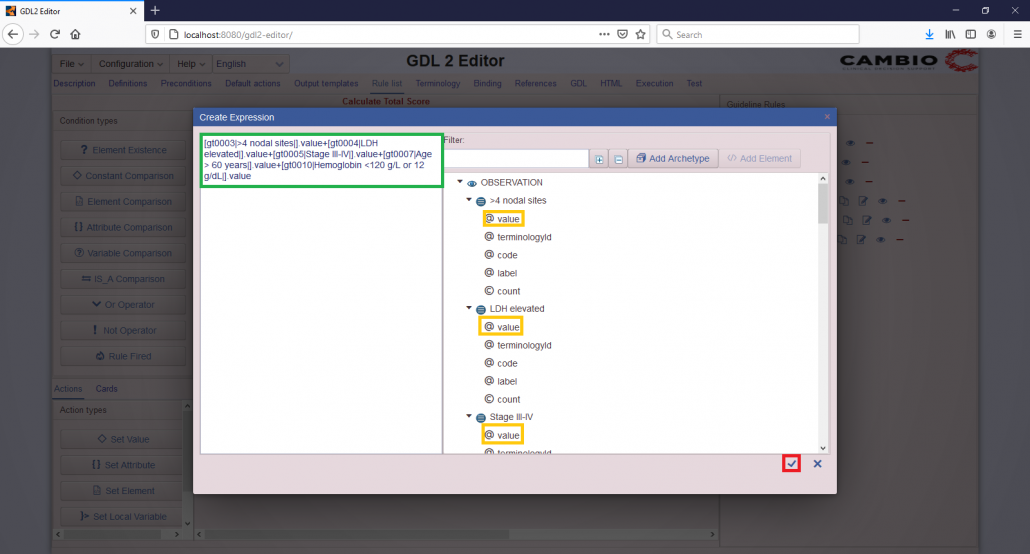
- Edit the expression in the expression editor after clicking the “Expression” label. You can edit the expression on the left side of the dialog box. You should double click each @value attribute below “>4 nodal sites”, “Stage III-IV”, “LDH elevated”, and “Haemoglobin” elements and add a “+” sign between the attributes. After double clicking an attribute, the respective [Element].value expression shows up in the expression editor, where you should type in the “+” character. You should add a “+” sign between attributes, indicating that you wish to sum the subscores. After including all subscores in the expression, check if it is the same as in the screenshot, then confirm the expression by clicking the check mark.
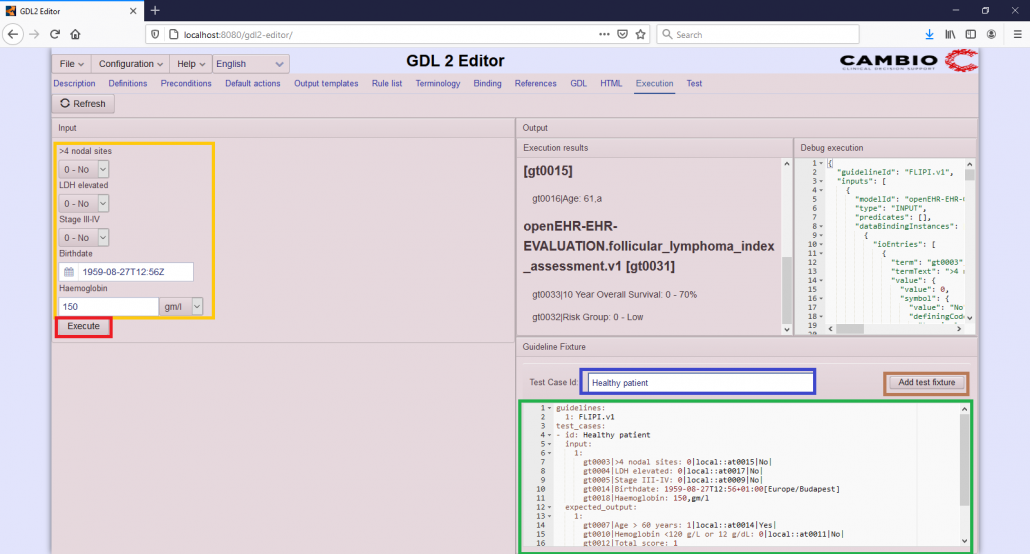
7. Check your guideline in the Execution tab.
Now, you are done with your guideline, but first make a quick check that everything works fine.
- Open the Execution tab.
- Fill in all input values with a relevant number.
- Click on the Execution button (red box on the screenshot).
- The output will be displayed in the corresponding field (green box). It is also possible to copy the results as a test case to the Test tab by giving a name to the test case (blue box) and then clicking the Add test fixture button (brown box).
8. Save your guideline.
- If everything works as intended, we recommend to save your guideline.
- Save your guideline with the name “FLIPI.v1”
9. Test your guideline with a test file.
You can always export the Execution results into the Test tab, but it is also possible to use a previously prepared test file. Here we will use the already made test file, available in the GDL2 library or directly downloadable here.
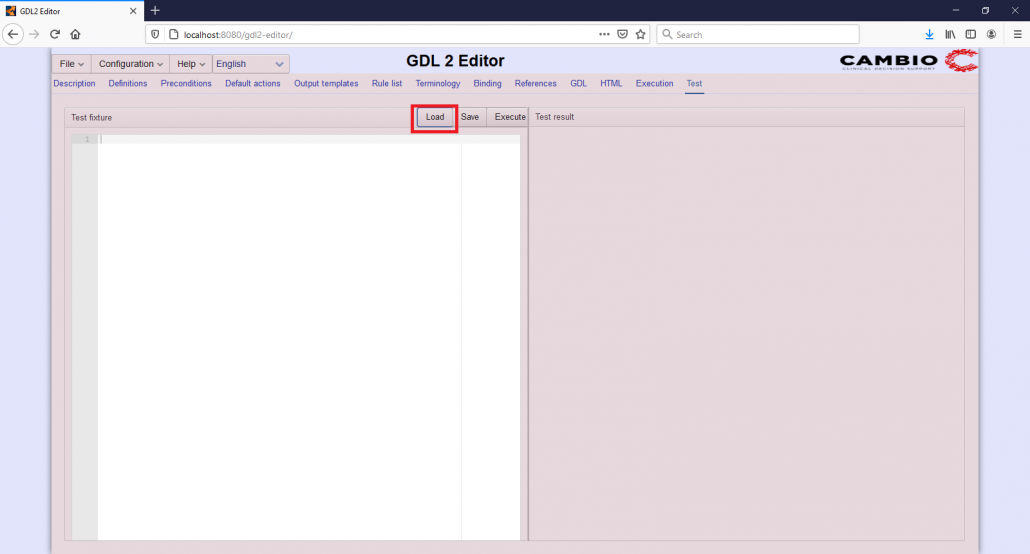
- Open the Test tab
- To start to load a test file click on the Load button in the Test tab
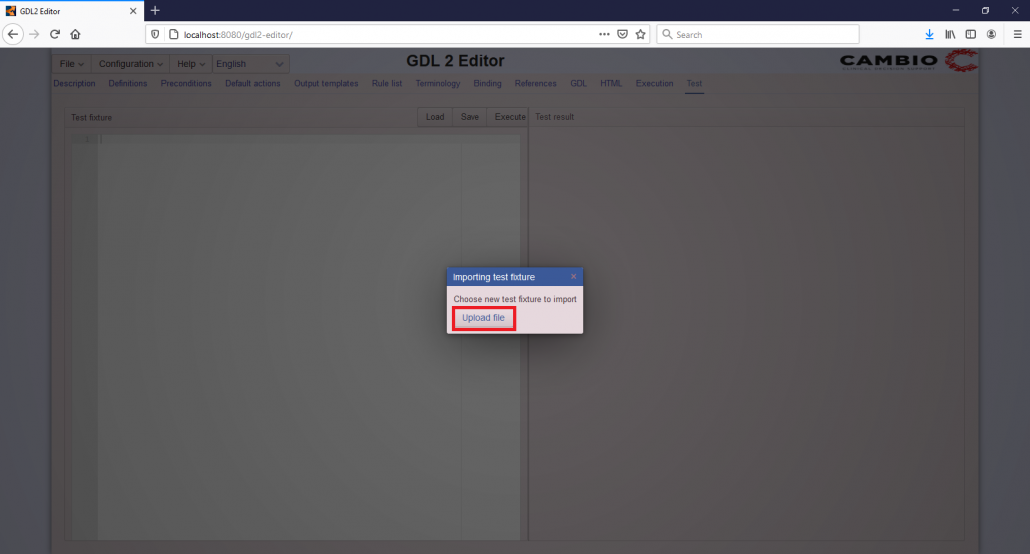
- You will see a dialog box. Click on the Upload file button. Then choose the test file you want to use.
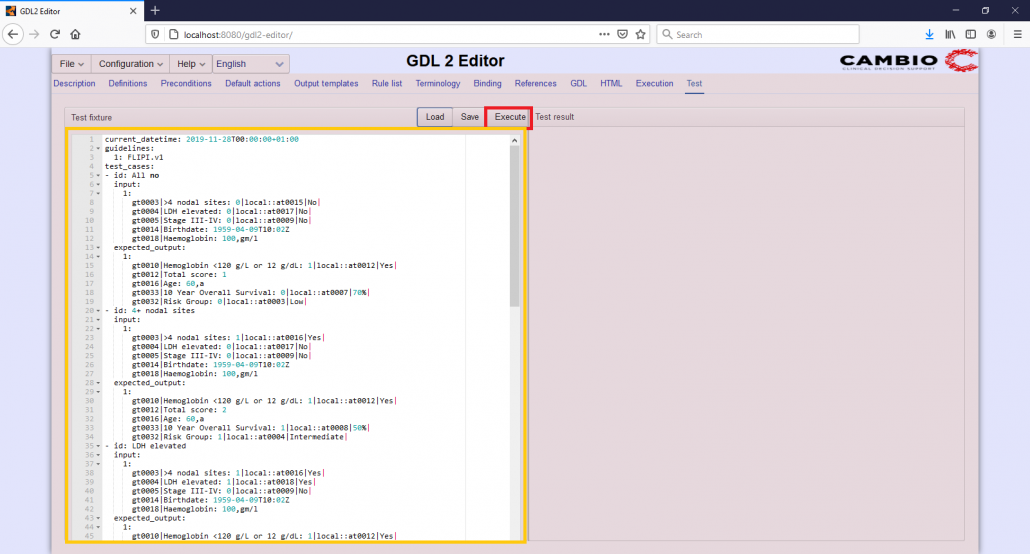
- This will load the test file. The content of the loaded test file will show up in the Test fixture field.
- You can Execute the test file by clicking on the Execute button.
- The result of the test will show up in the Test result field. If everything is alright, you should have all test results passed and ideally you should have tested 100% of the rules.