Creating a test fixture
When you have created your guideline you should always test it to make sure that the rules execute as expected. In the GDL2 Editor you can either test the guideline by running single tests in the Execution tab or create, save and load a test fixture that contains of a complete set of tests. This is done in the Test tab.
In this tutorial we are using the BMI guideline including BMI assessment, which we created in Tutorial I and Modifying your BMI guideline – Add assessment.
What to test
Which tests to run depends on the design and complexity of the guideline, but it is good practice to always test:
- All rules in the guidelines
- Edge values
- Extreme values
Exercise all rules
To make sure that the rules that you have created work correctly it is important to exercise all rules by running different tests.
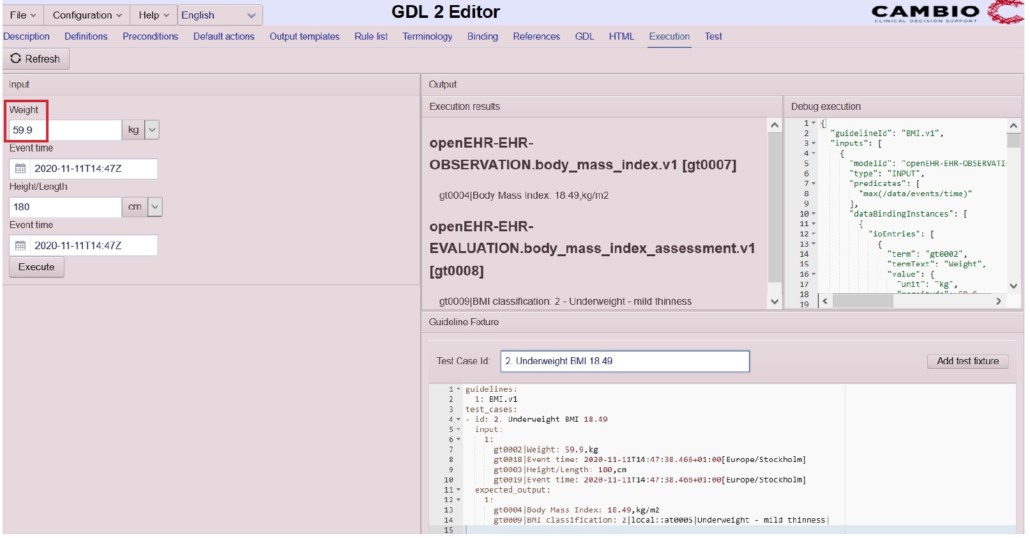
In the Execution tab of the GDL2 Editor, the rightmost section lets you know which rules were run (or fired) in that specific test case.
In the picture below, we have run the BMI guideline with the input values 80 kg and 180 cm. The Execution results section shows what is the calculated BMI value and which classification that correspond to (yellow boxes). The Debug execution section shows the execution of the guideline that includes the inputs, output for this specific test case, and the order of rules executed (Calculate BMI and BMI normal range rules were fired in this test case).
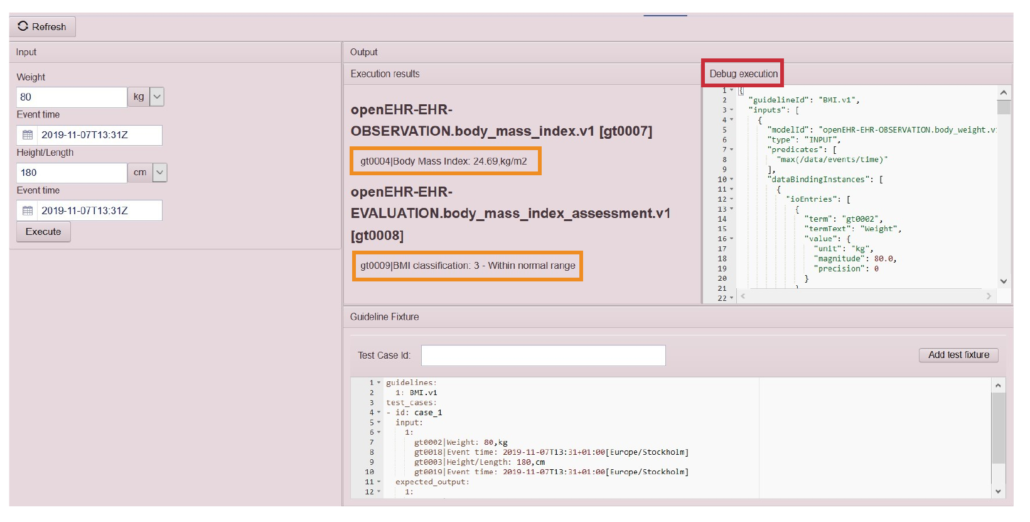
Make sure that the tests you create exercise all rules of the guideline.
Test the edge values
Edge values are values that are on the limit between two separate rules. In the BMI guideline, we have created rules to classify the BMI value according to:
BMI <18,50 – underweight
– <16,00 – severe thinness
– 16,00-16,99 – moderate thinness
– 17,00-18,49 – mild thinness
—————————————–
BMI 18,50 – 24,99 – normal range
—————————————–
BMI 25,00-29,99 – overweight/pre-obese
—————————————–
BMI ≥30 – obese
– 30,00-34,99 – obese class I
– 35,00 – 39,99 – obese class II
– ≥40 – obese class III
and this gives us a lot of edge values.
For example:
A BMI value of 15.00 will be classified as severe thinness. As will 15.50 and 15.99 but as soon as we reach 16.00, we enter another classification, moderate thinness. So in this case we would want to create tests to make sure that anything below 16.00 is classified as severe thinness, but that 16.00 and above (up to 16.99) is classified as moderate thinness.
Extreme values
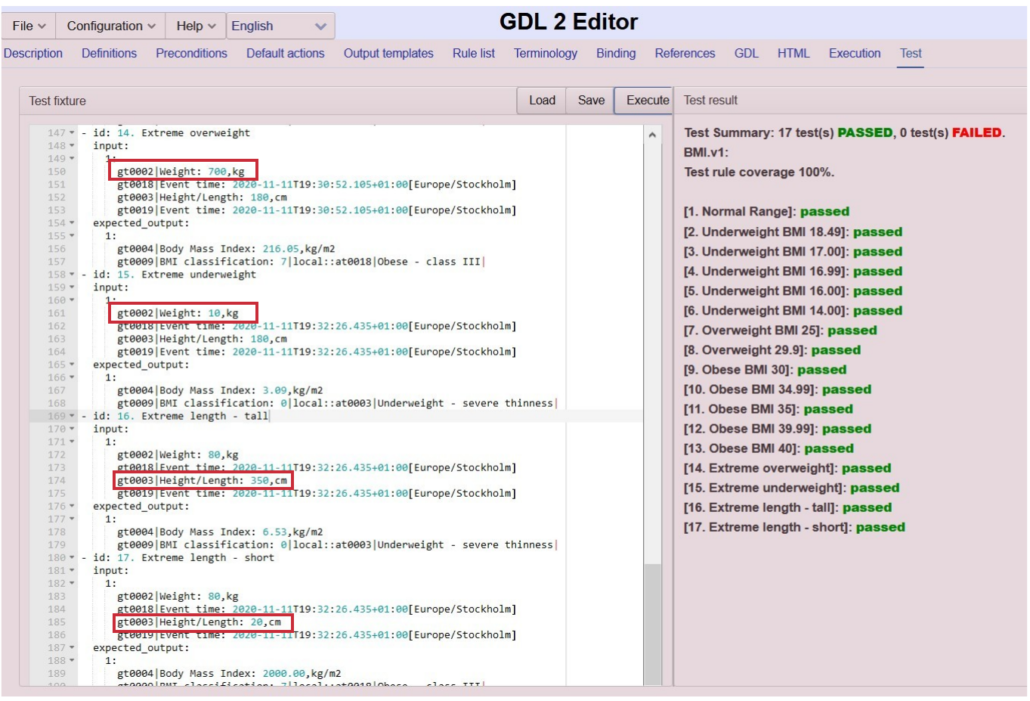
Extreme values are tested to ensure that these are handled in the way you have designed them to be. Our BMI guideline is modelled to treat extreme values just like any other value, but some guidelines could include preconditions or rules to differentiate between what is thought to be normal and what is thought to be extreme.
For example, if we model a BMI guideline with the purpose of calculating the BMI for adult humans we might want to exclude extreme heights, such as 350 cm or 1.8 cm. If that is the case, we need to check that a test with the height input 350 cm does not result in calculating and classifying that BMI.
Example of other tests
Depending on the guideline, there could very well be other types of tests that are relevant to reach full test coverage. These could, for example, be:
- Using different units
- Using a combination of units that are not allowed
- Providing no input in order to test default values
- Providing several instances of the same input with different timestamps to ensure the use of the latest value
Create a test fixture
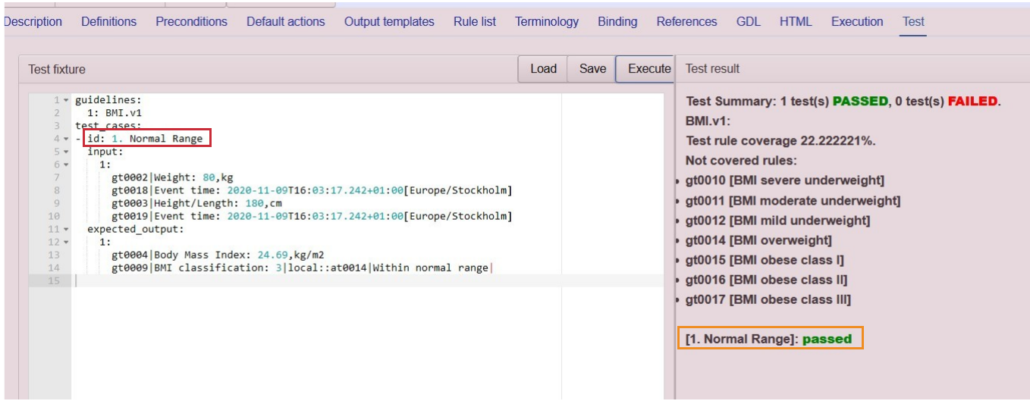
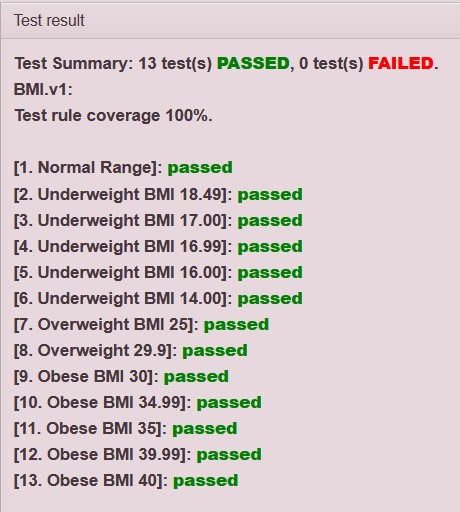
To create a new test fixture, click on the Add test fixture button (yellow box) located in the Guideline Fixture where a guideline fixture is automatically generated when running a test in the Execution tab (big red box). On clicking the Add test fixture button, the test fixture is created in the Test fixture area of the Test Tab. We advise you to rename the test case from the default name case_1 to something more describing. This can be done by writing the intended name in the Test Case Id field (small red box). In this case, we use the Normal range since the test produces a BMI value that is classified as normal.
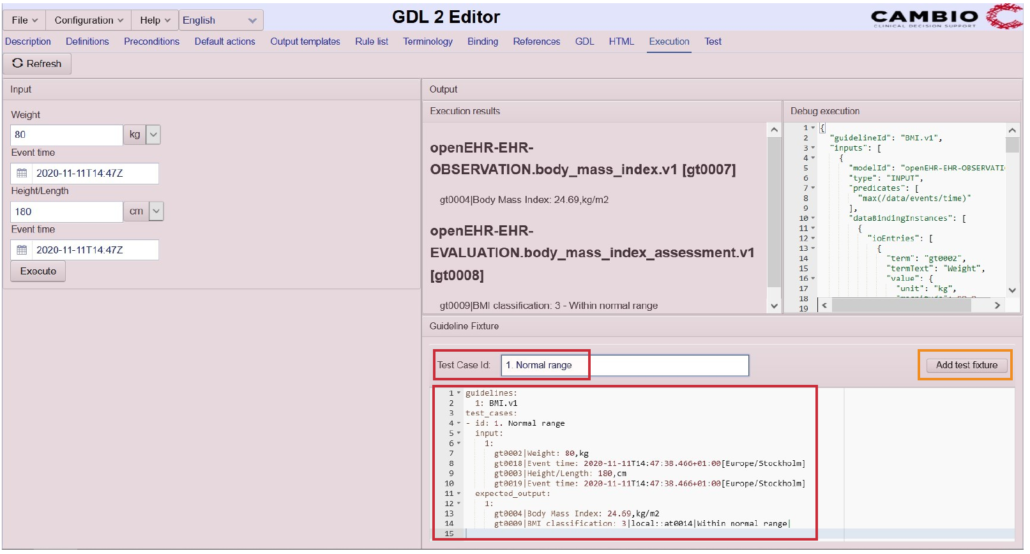
On the Test tab, clicking on the Execute button, the Test result section shows if the test case, Normal Range passed or failed (yellow box) and the overall test summary.
Now you can go ahead and create more tests and add them to the Text fixture.
The next test we want to create is the edge value between
BMI 17,00-18,49 – mild thinness and
BMI 18,50 – 24,99 – normal range
i.e. BMI = 18.49 kg/m2.
To get BMI 18.49 we use the input values weight 59.9 and height 180 cm.
You can click on the Execute button on the Test tab and check if the test passes or fails.
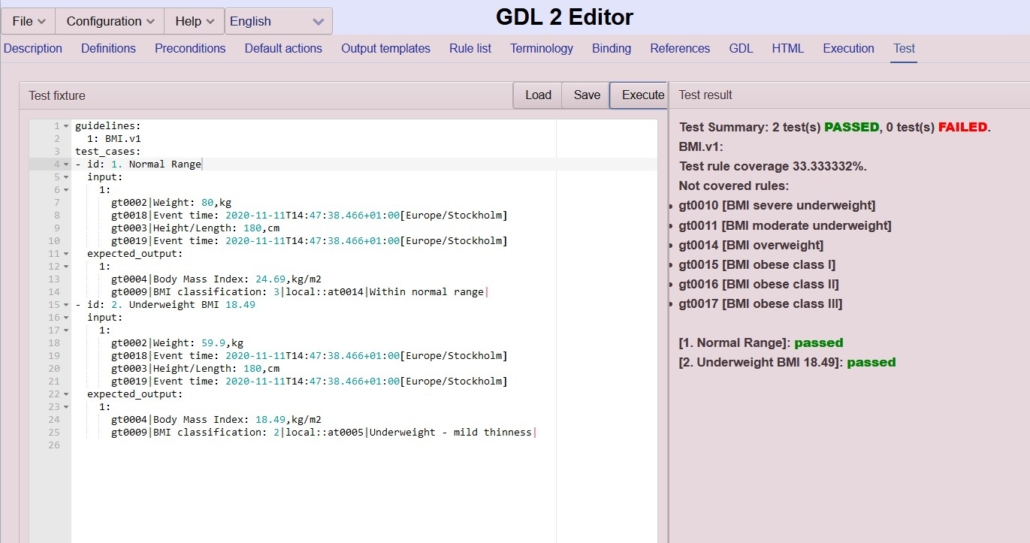
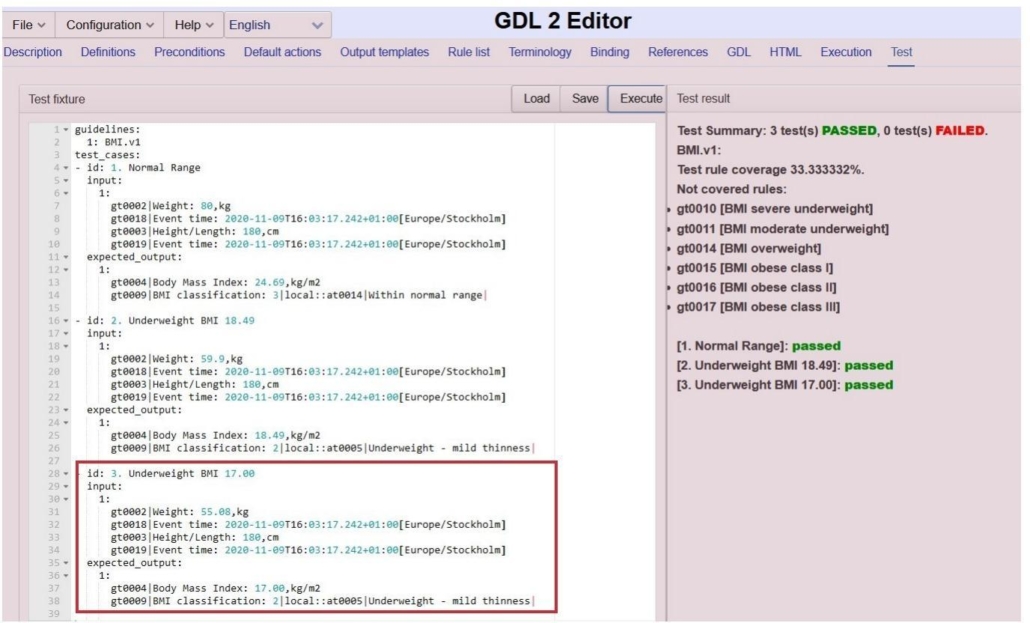
Now we can keep adding test cases to the test fixture, like this for BMI 17.00.
Completing the test fixture
When we have created test cases that execute all rules of our guideline, like:
And added some rules for testing extreme values, like:
We can save our test fixture. To do that, we click on the Save button just above the Test fixture area.
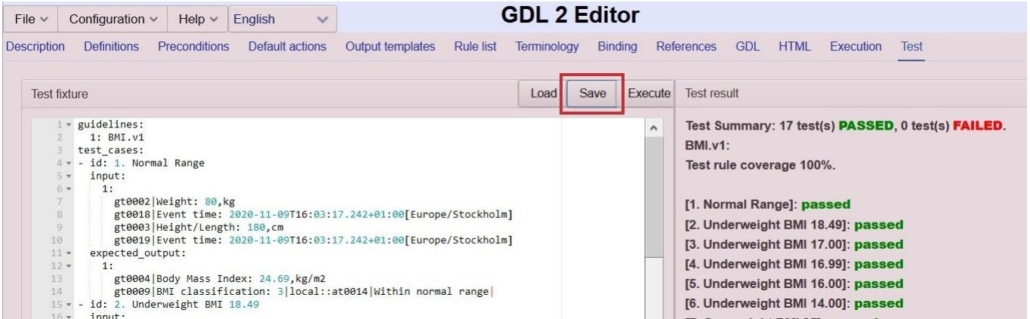
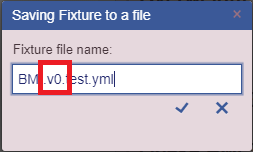
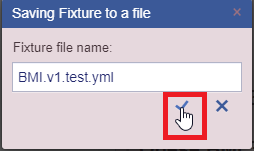
We edit the name, if needed, to match the name of the guideline. Here we want to change this to v1. We confirm saving the file by clicking the checkmark.